

These docs are public and open source.Edit on GitHub
03
PREPARE THE CAR
~30 minutes
//You'll need
- The NeoRacer and its accessories.
- The Cudy router.
- A LiPo battery.
- A USB keyboard and mouse.
- A monitor with an HDMI cable.
- An internet connection.
The Cudy router sits inside the mid chassis, under the top plate. Steps with a camera icon have a reference picture.
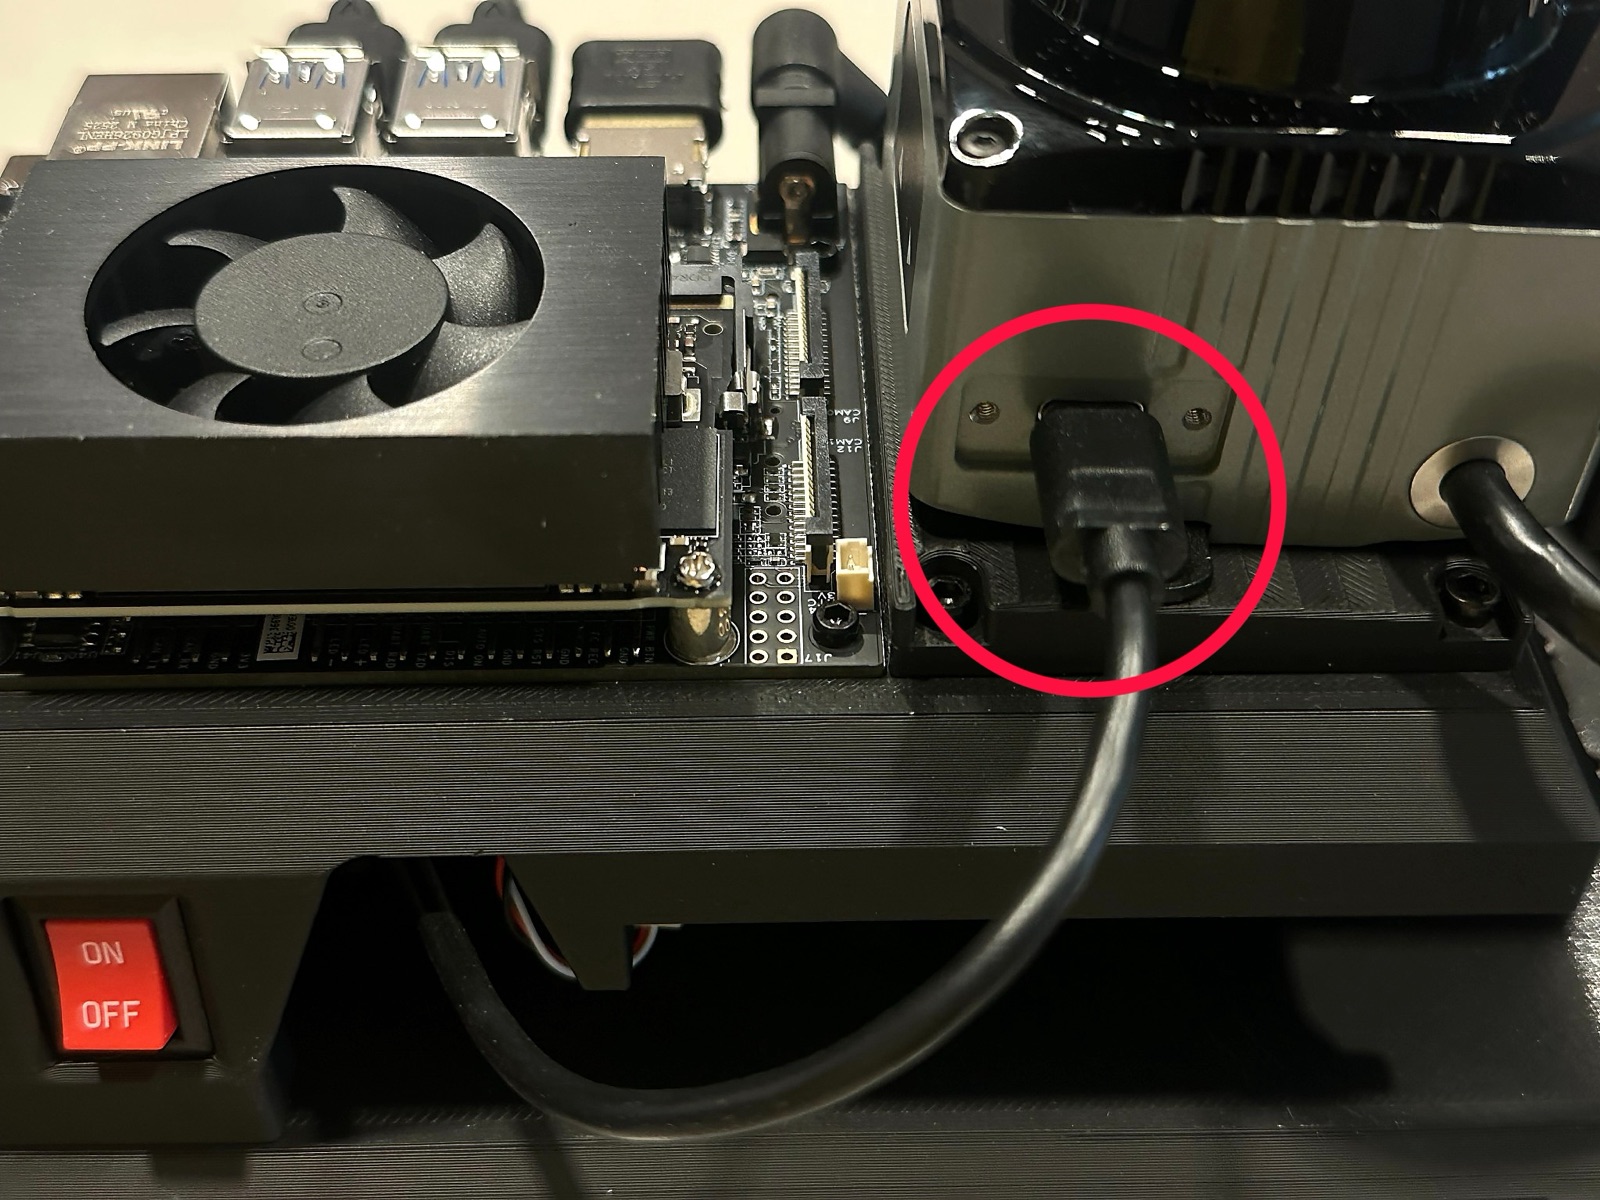
- Before installing the router, note the longer USB-C cable coming out of the left side of the car. It connects to the LiDAR, not the router.
- Unscrew the front two screws of the top chassis.
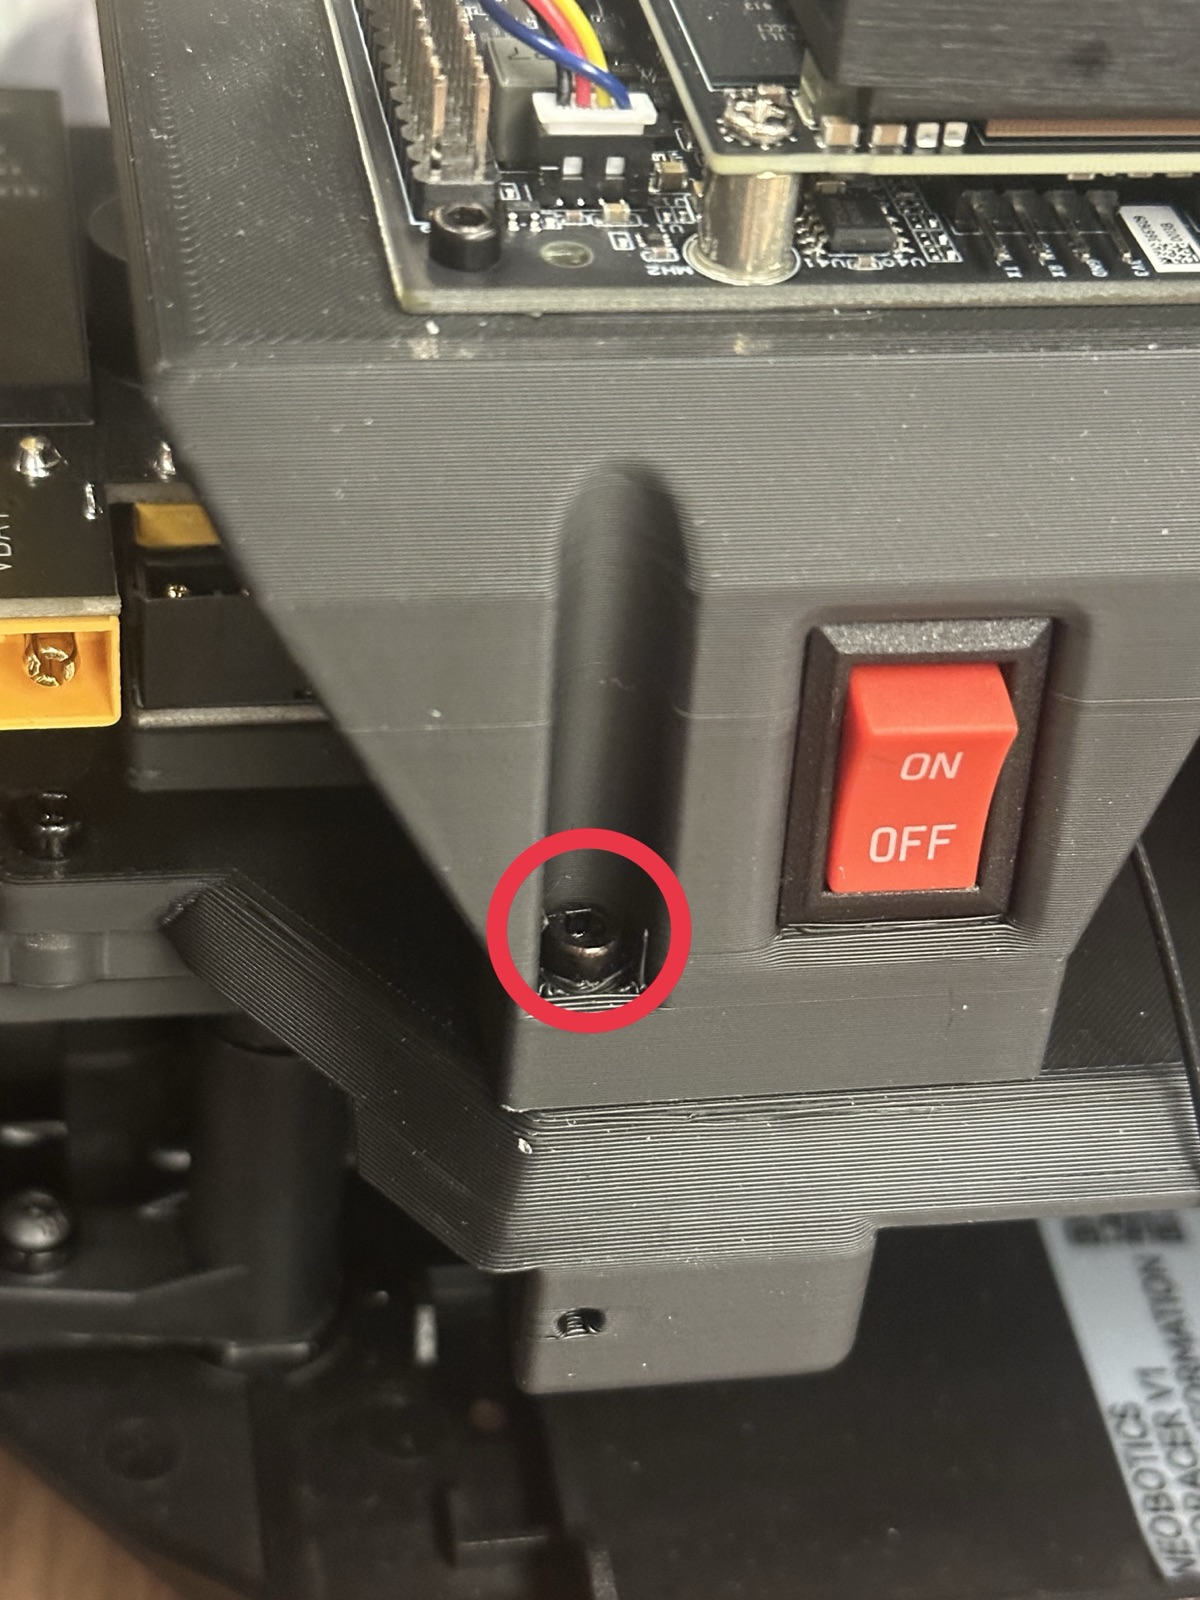
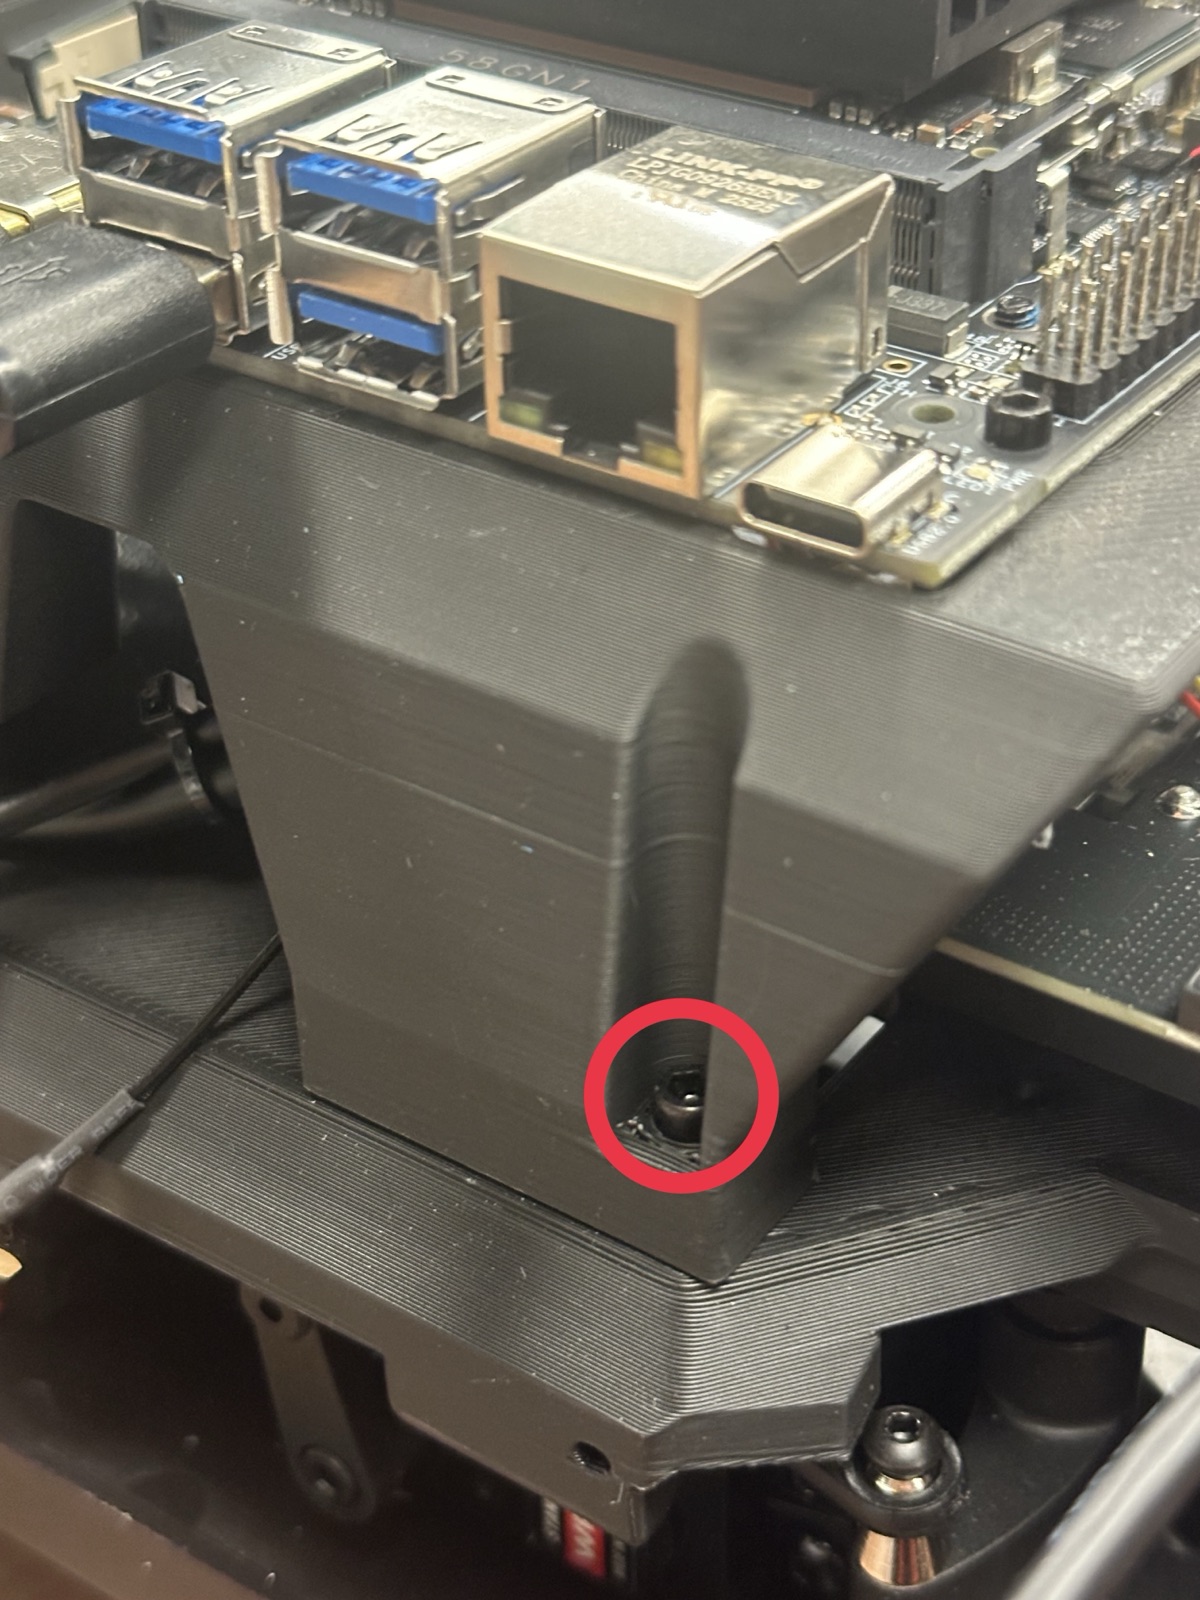
- Unscrew the dot matrix to access the rear top-chassis screws.
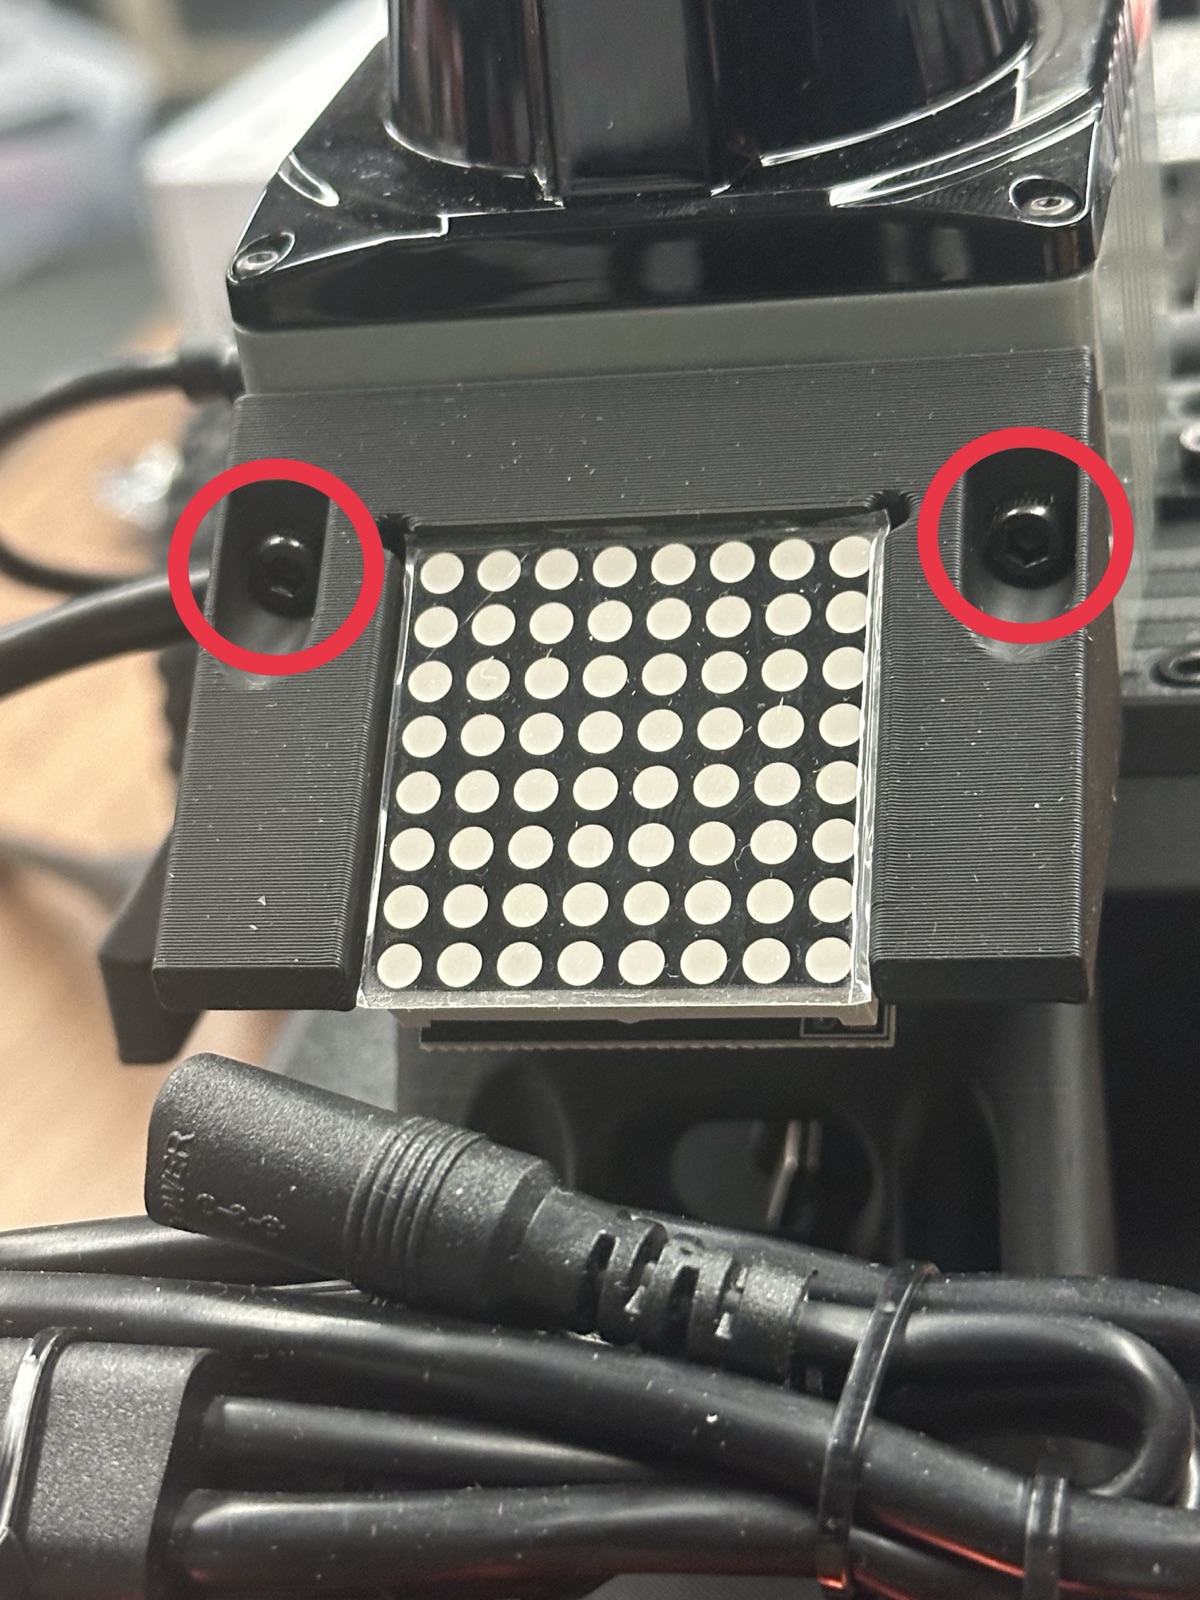
- Unscrew the rear two screws.
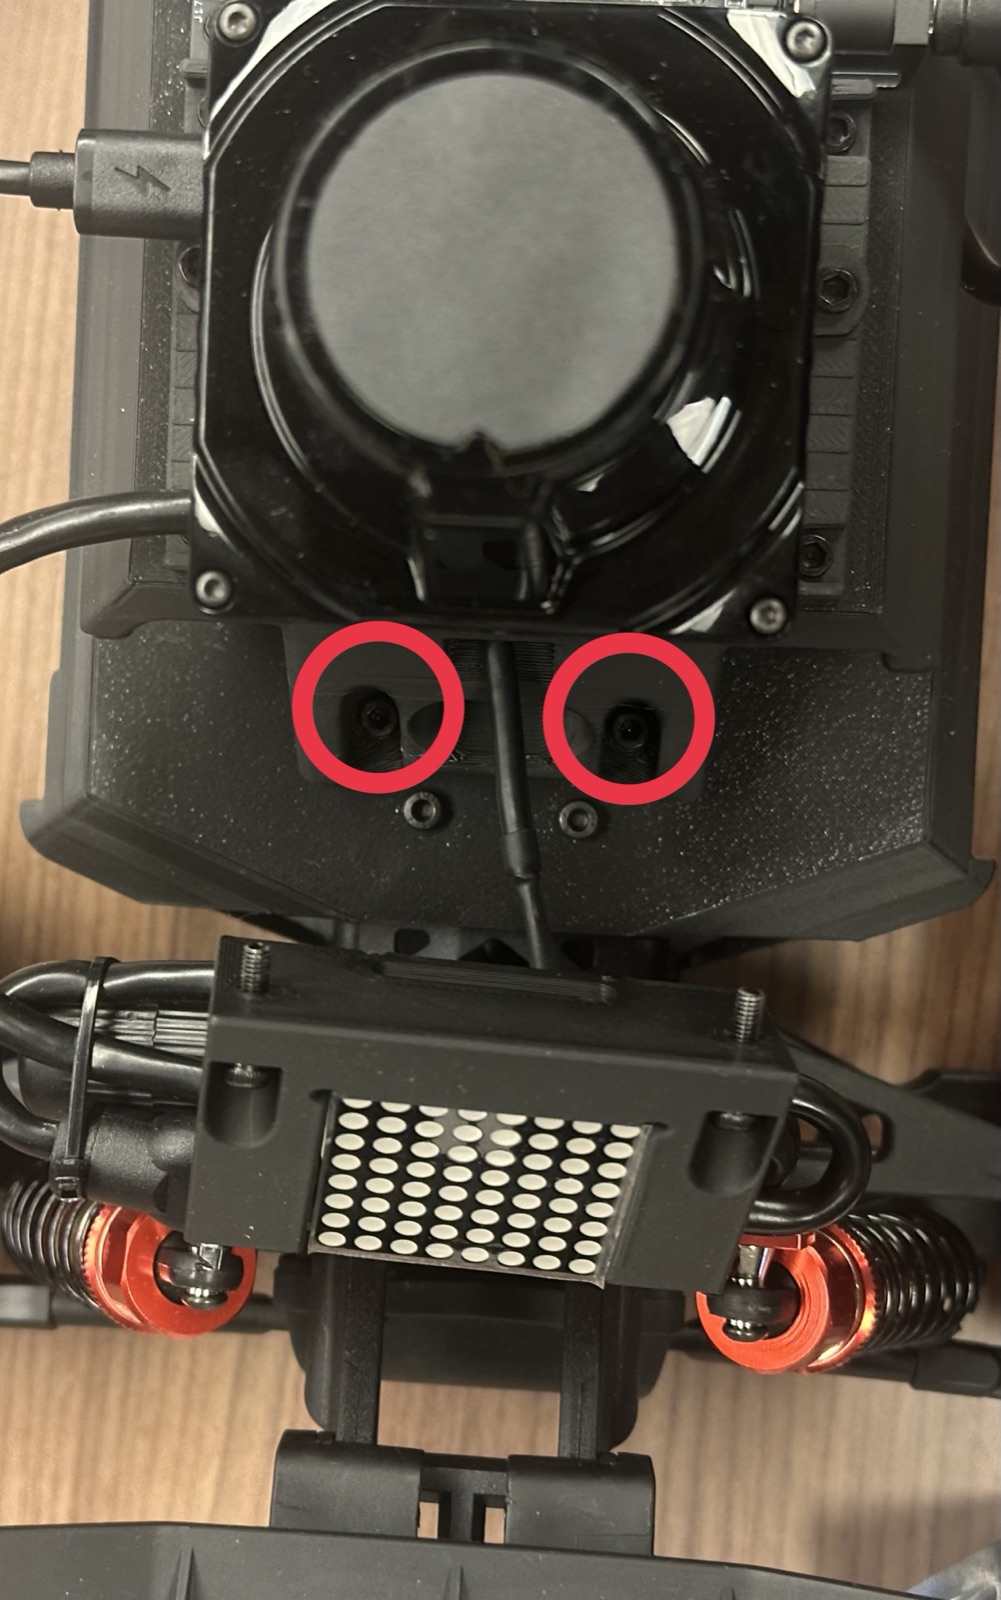
- The top chassis can now be removed, or rotated a little out of the way. Be careful with the cables.
- Take the Cudy router on its own, without its cables, and slide it into the rear of the car under the top chassis, with its ports facing the front of the car.
- Connect the Ethernet cable and the short USB-C cable in the top chassis. The Ethernet cable plugs into the router's LAN port. Make sure you use the correct USB-C cable: the shorter one connects to the underside of the PCB, while the LiDAR's cable connects to the top side.
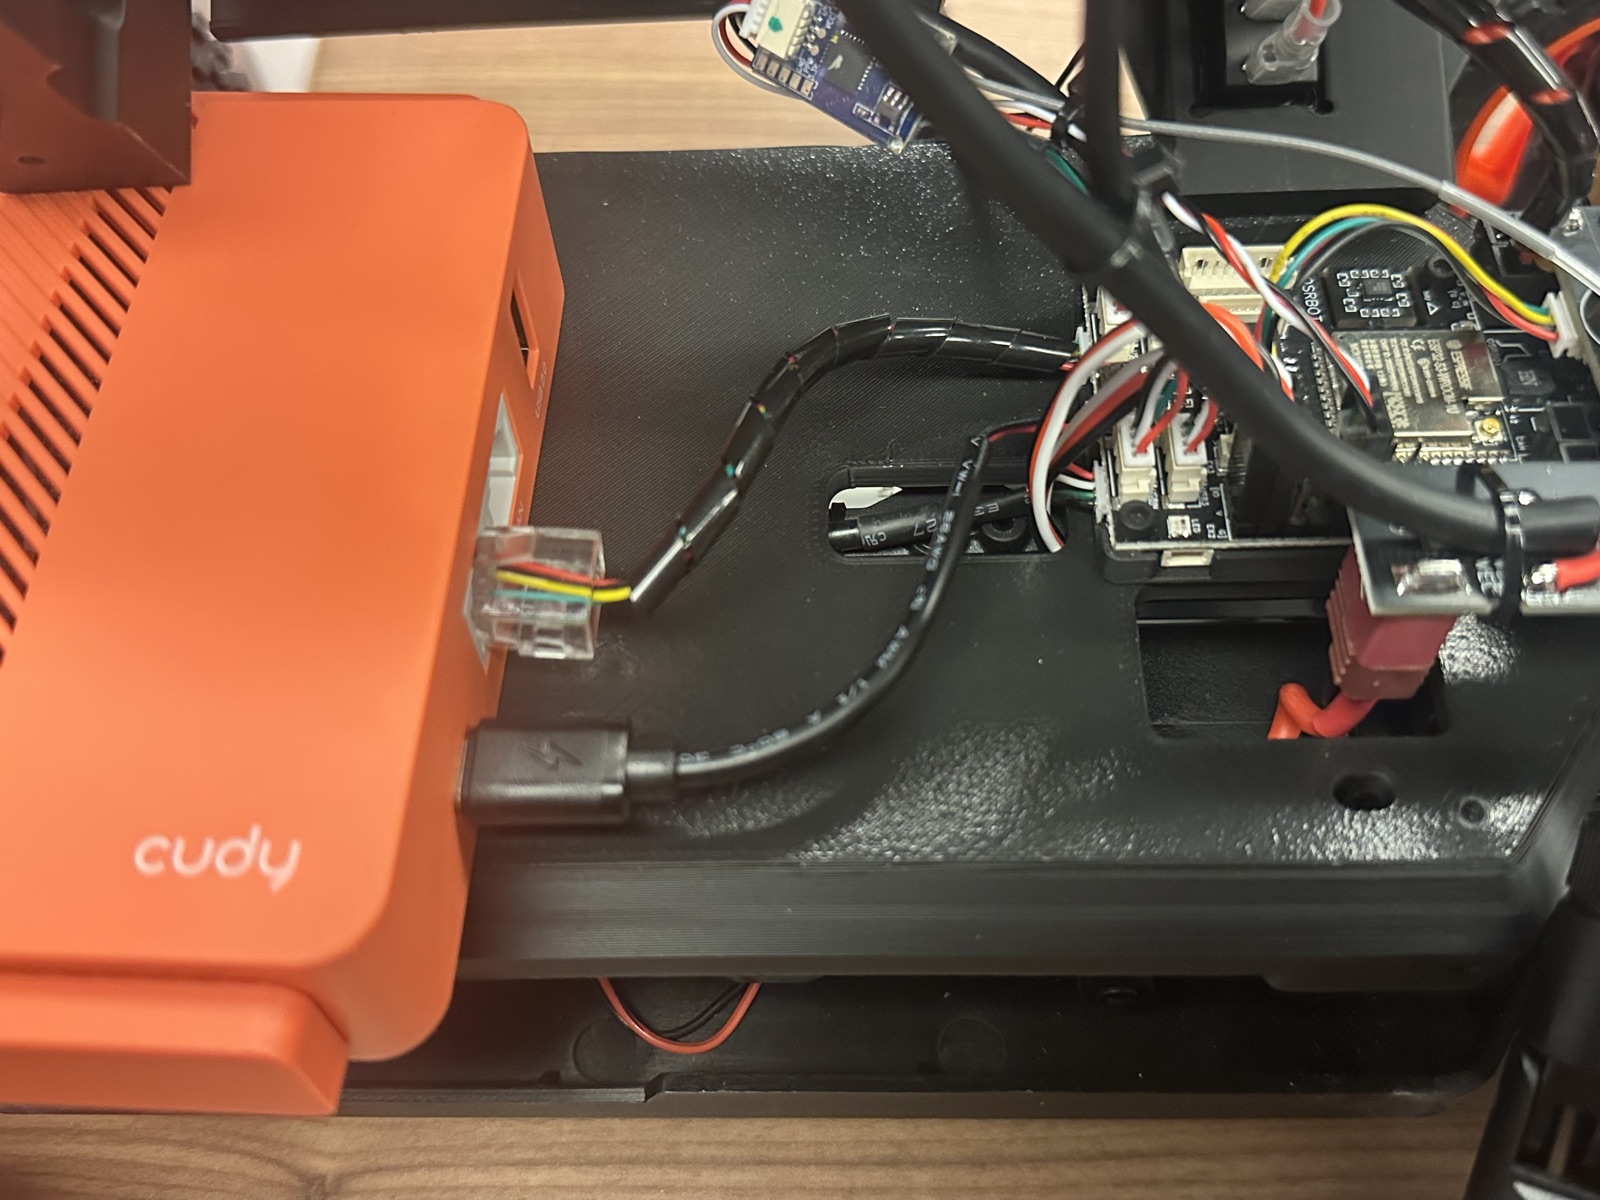
- Fit the router snugly within the top chassis and screw the chassis back in.
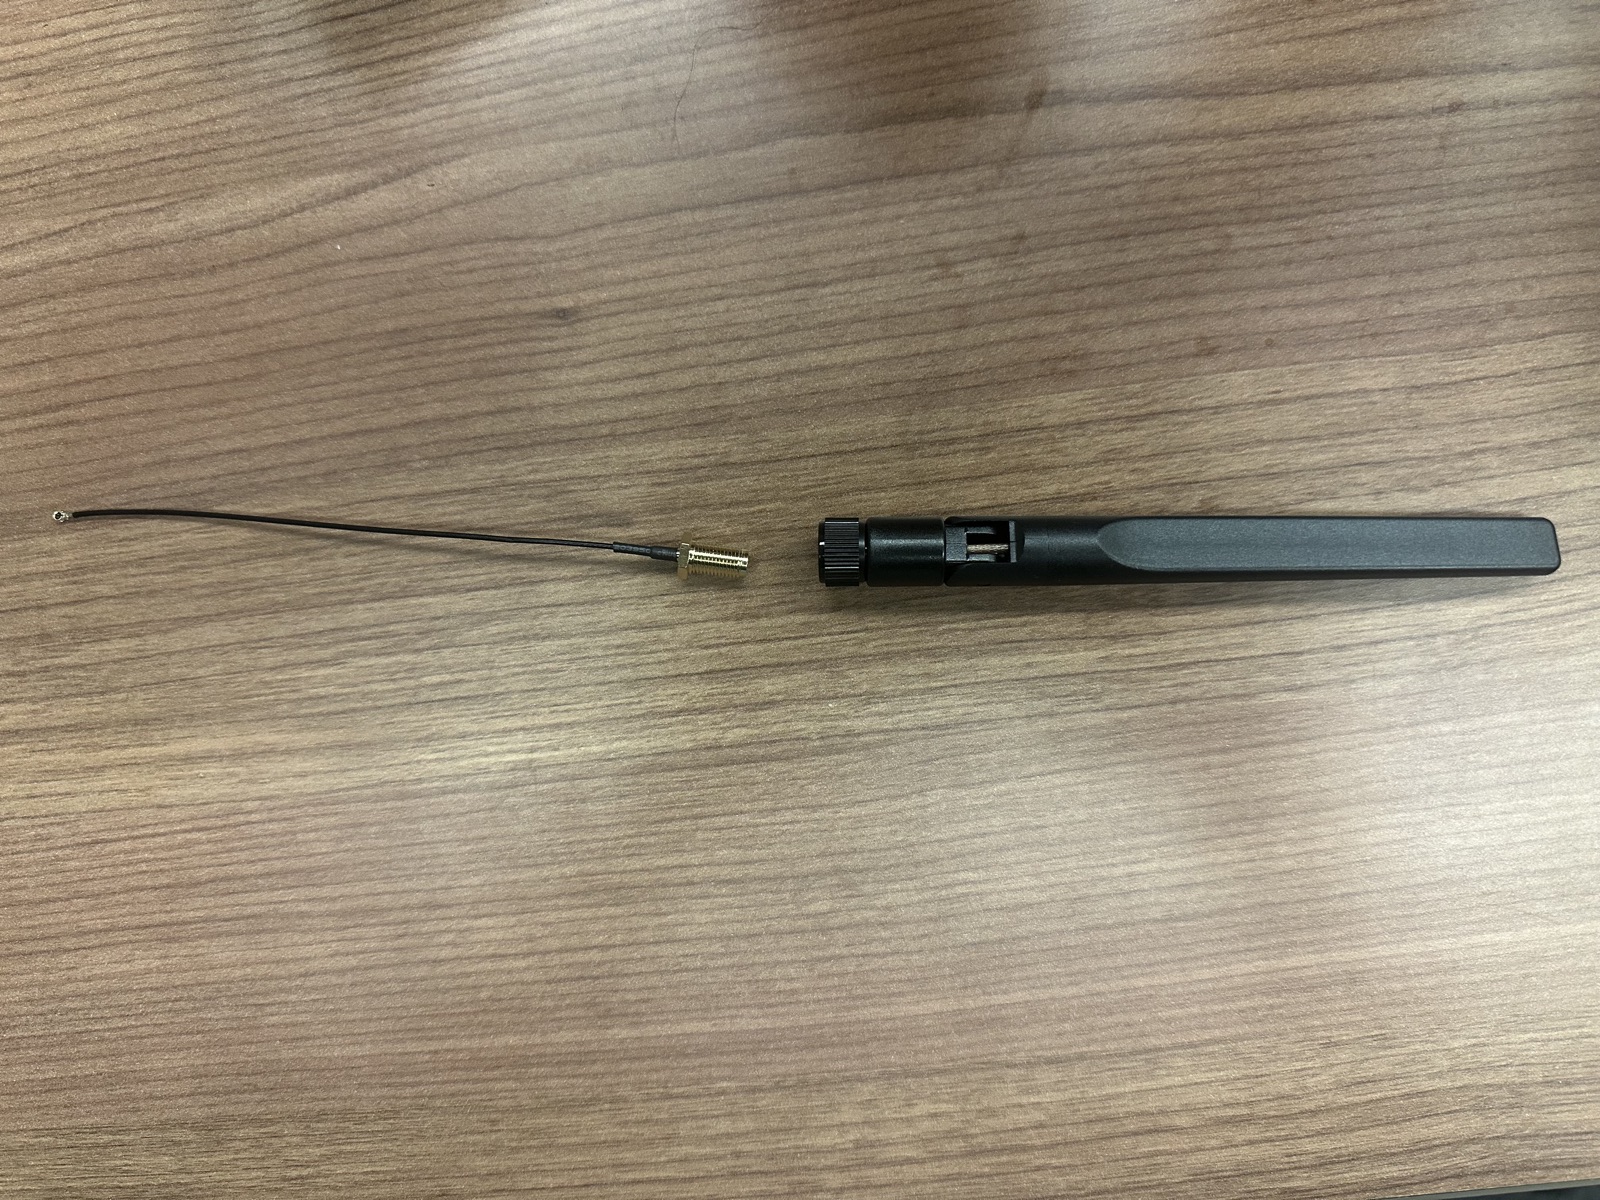
The Jetson's Wi-Fi card sits on its underside, so the two antenna cables are attached from below. Each antenna comes in two parts: the cable, and the plastic antenna that screws onto its end.
- Power the car off before you unmount the Jetson.
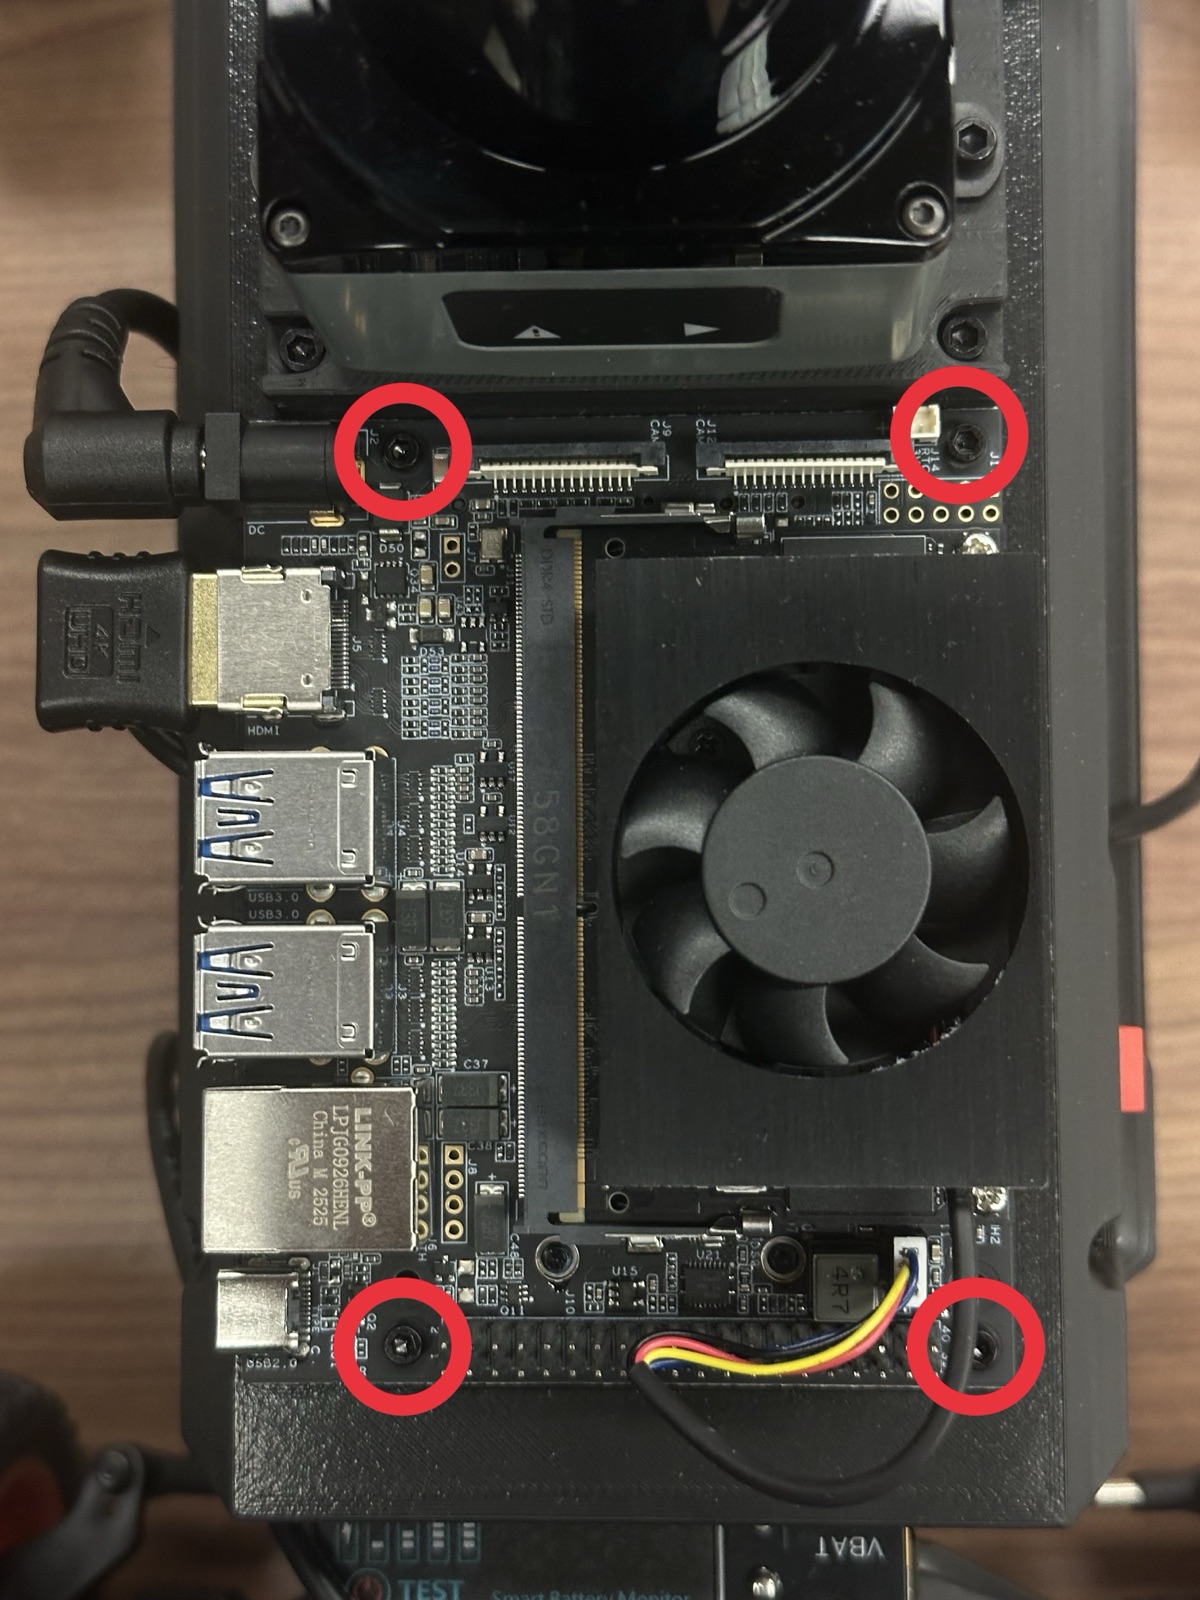
- Unscrew the Jetson from its 3D-printed chassis mount to reach the Wi-Fi card underneath. It is held by four hex screws.
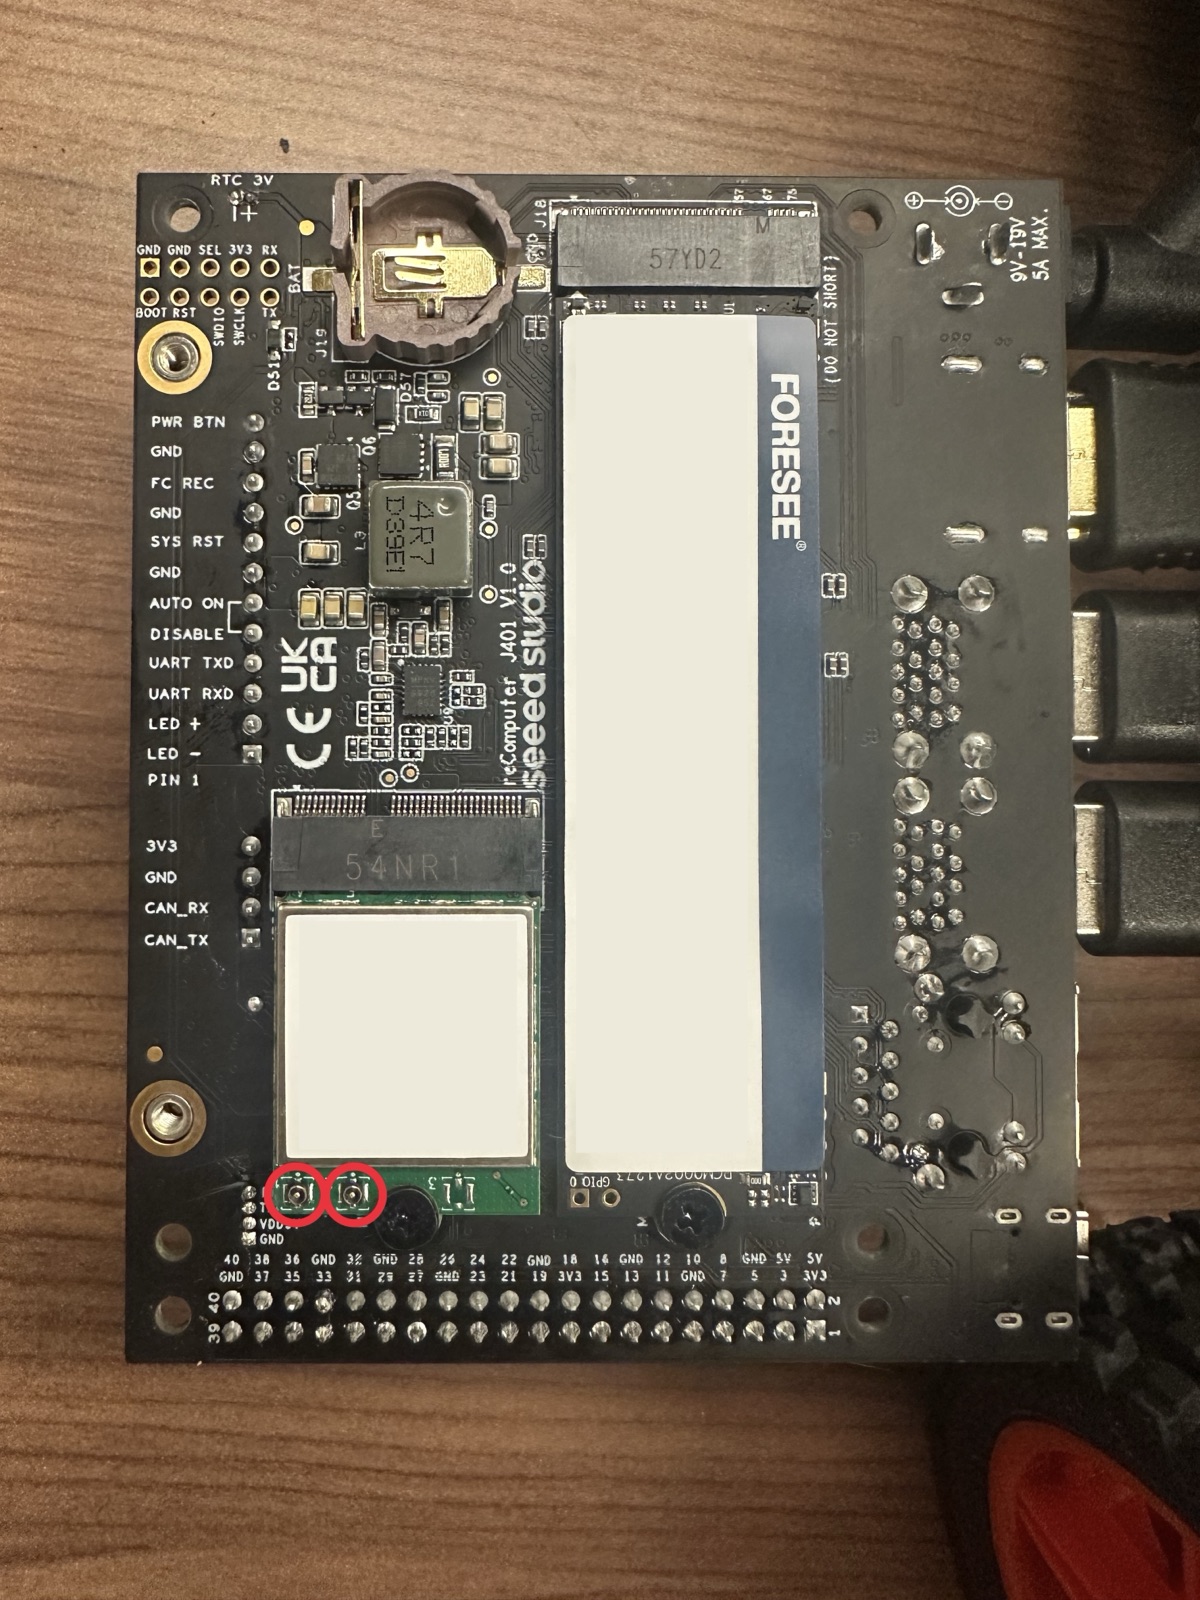
- Flip the Jetson over to find the two antenna sockets on the Wi-Fi card.
- Keep the plastic antennas aside for now; they screw onto the cable ends later.
- Keep the Jetson on a steady surface and hold the U.FL connector perfectly vertical over its socket on the card. Remove any tension in the wire so the U.FL does not sit misaligned, then press the connector onto the socket until it clicks. It may take a few attempts, as the connector is very delicate.
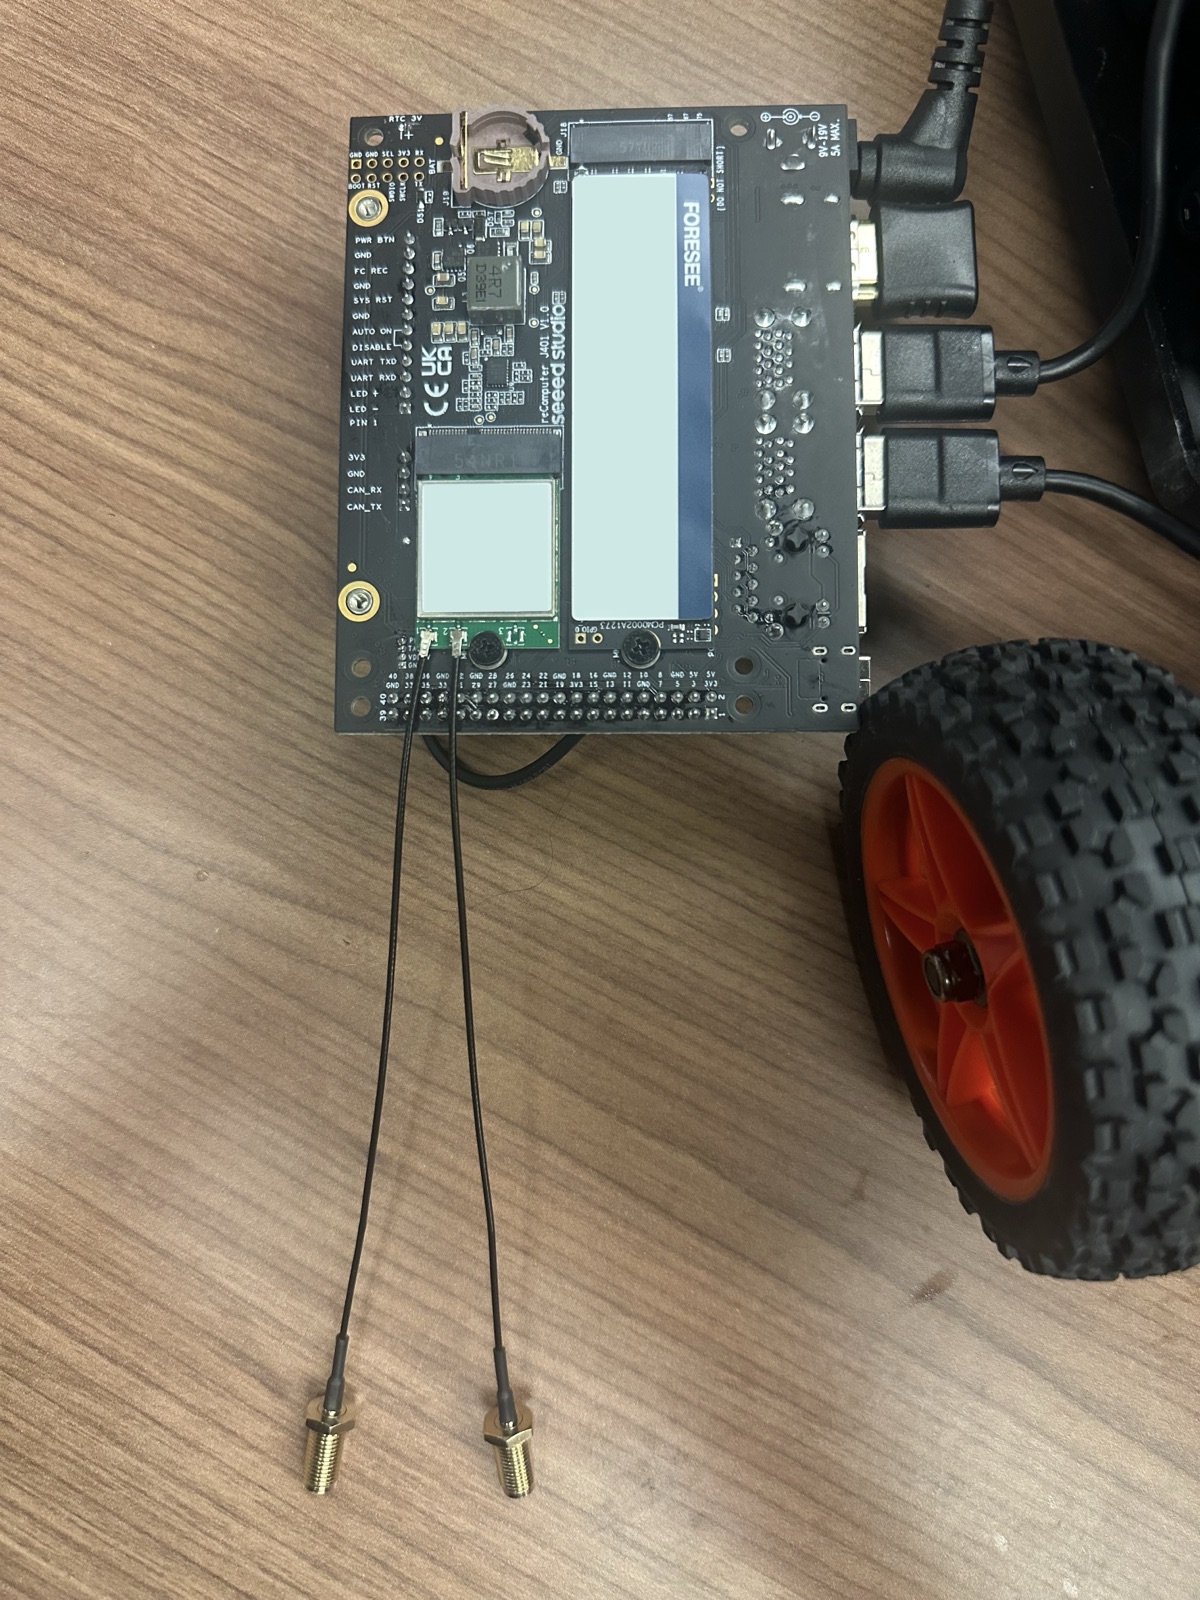
- Screw the Jetson back onto its mount and route the cables through the chassis to the sides of the car. Make sure all four screw holes line up with the Jetson before screwing it back in.
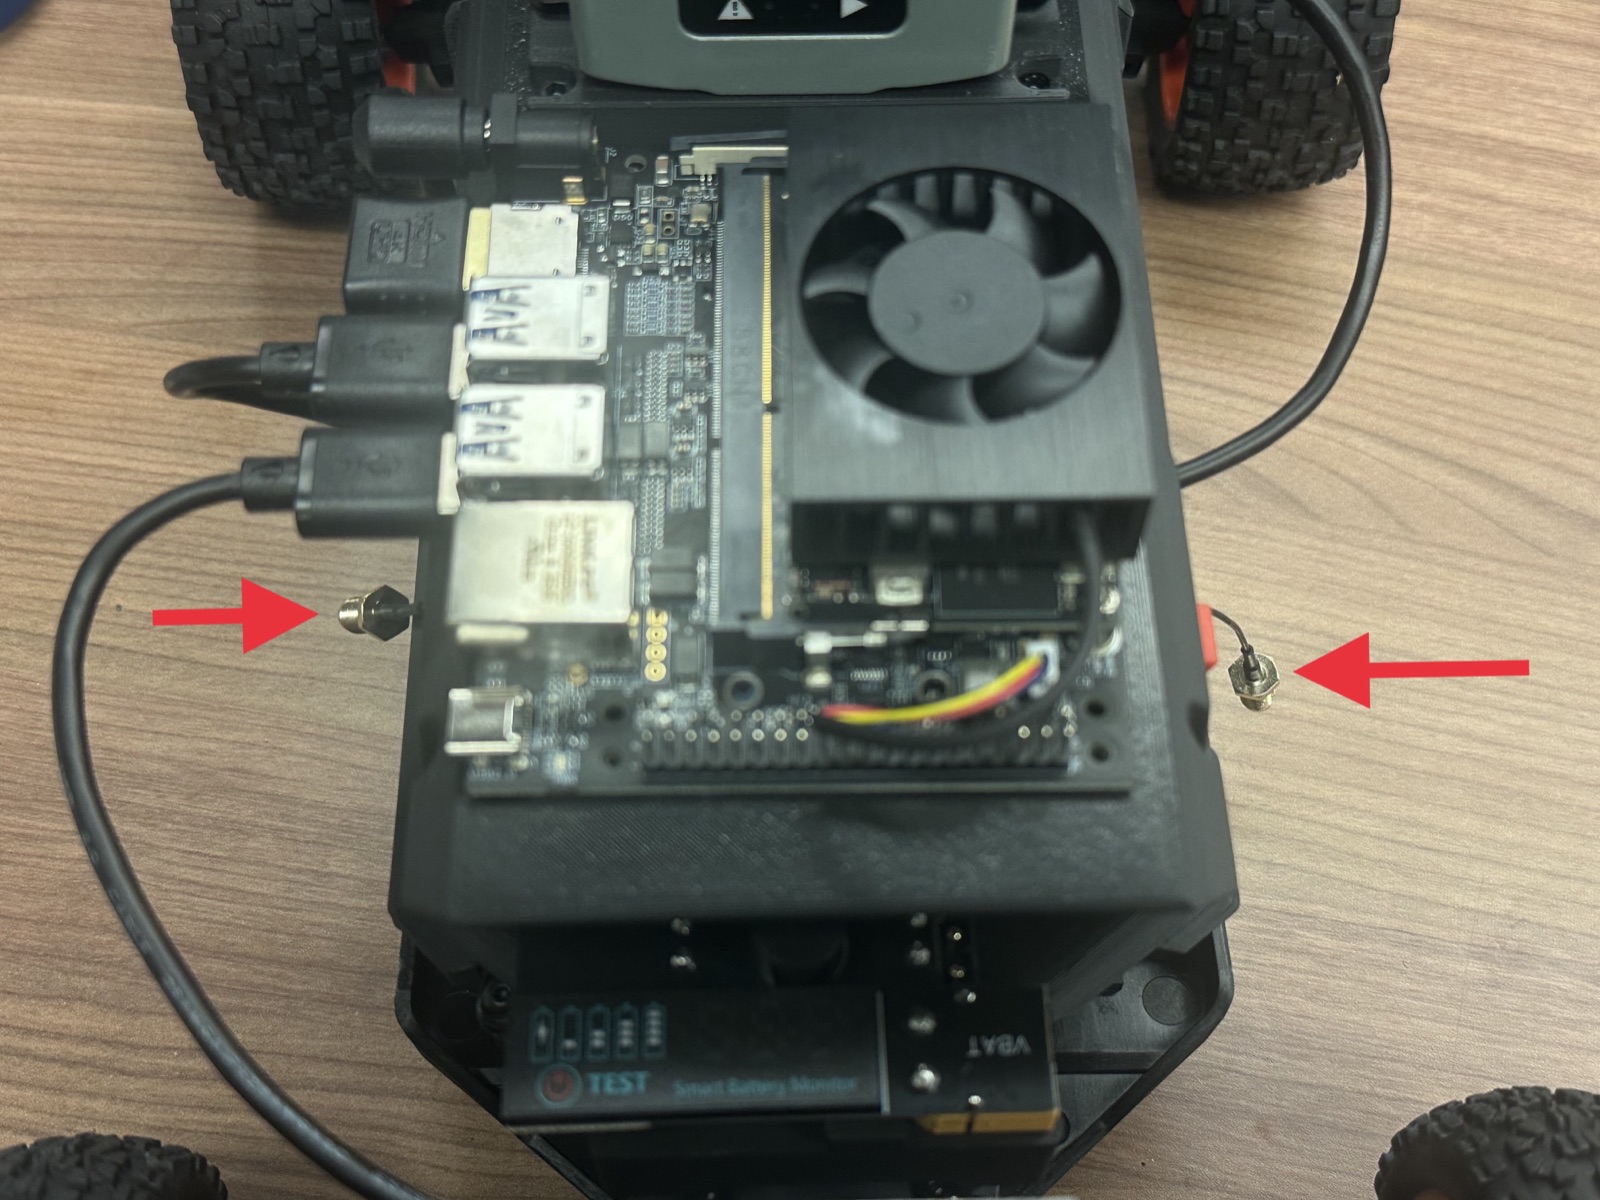
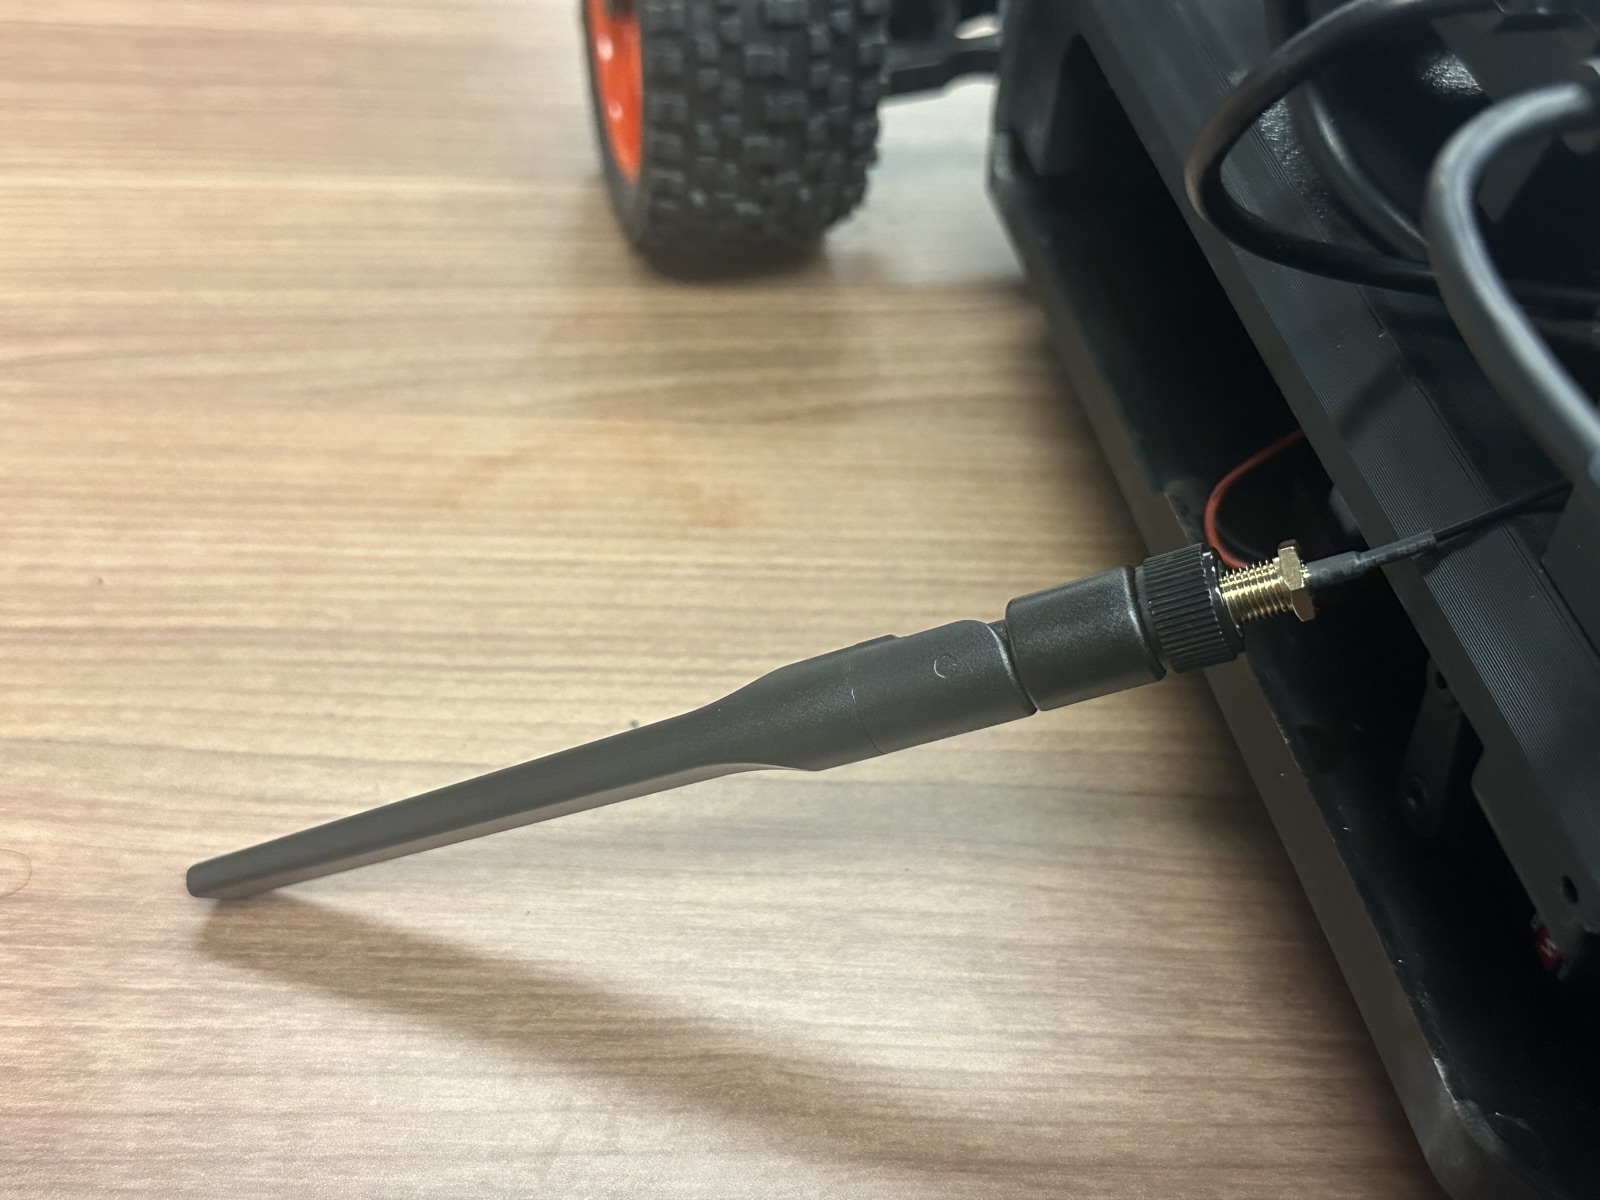
- Screw the plastic antennas onto the cable ends on each side.
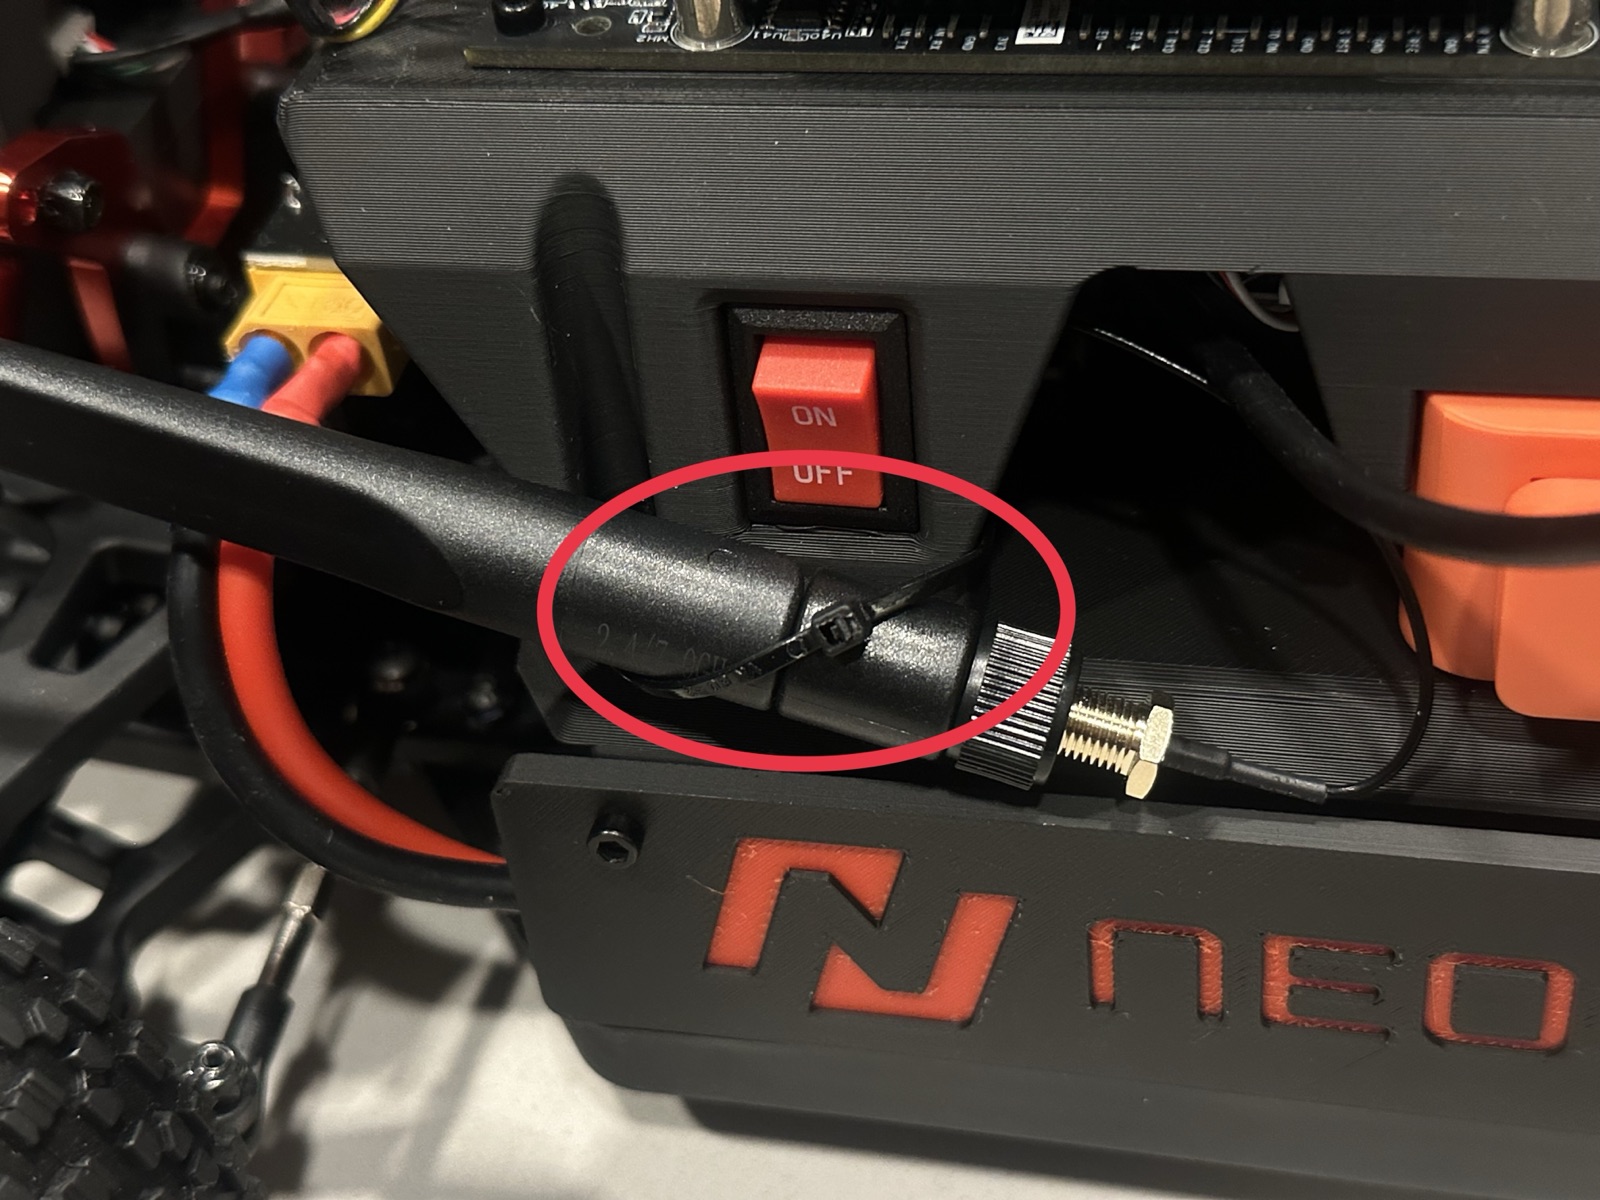
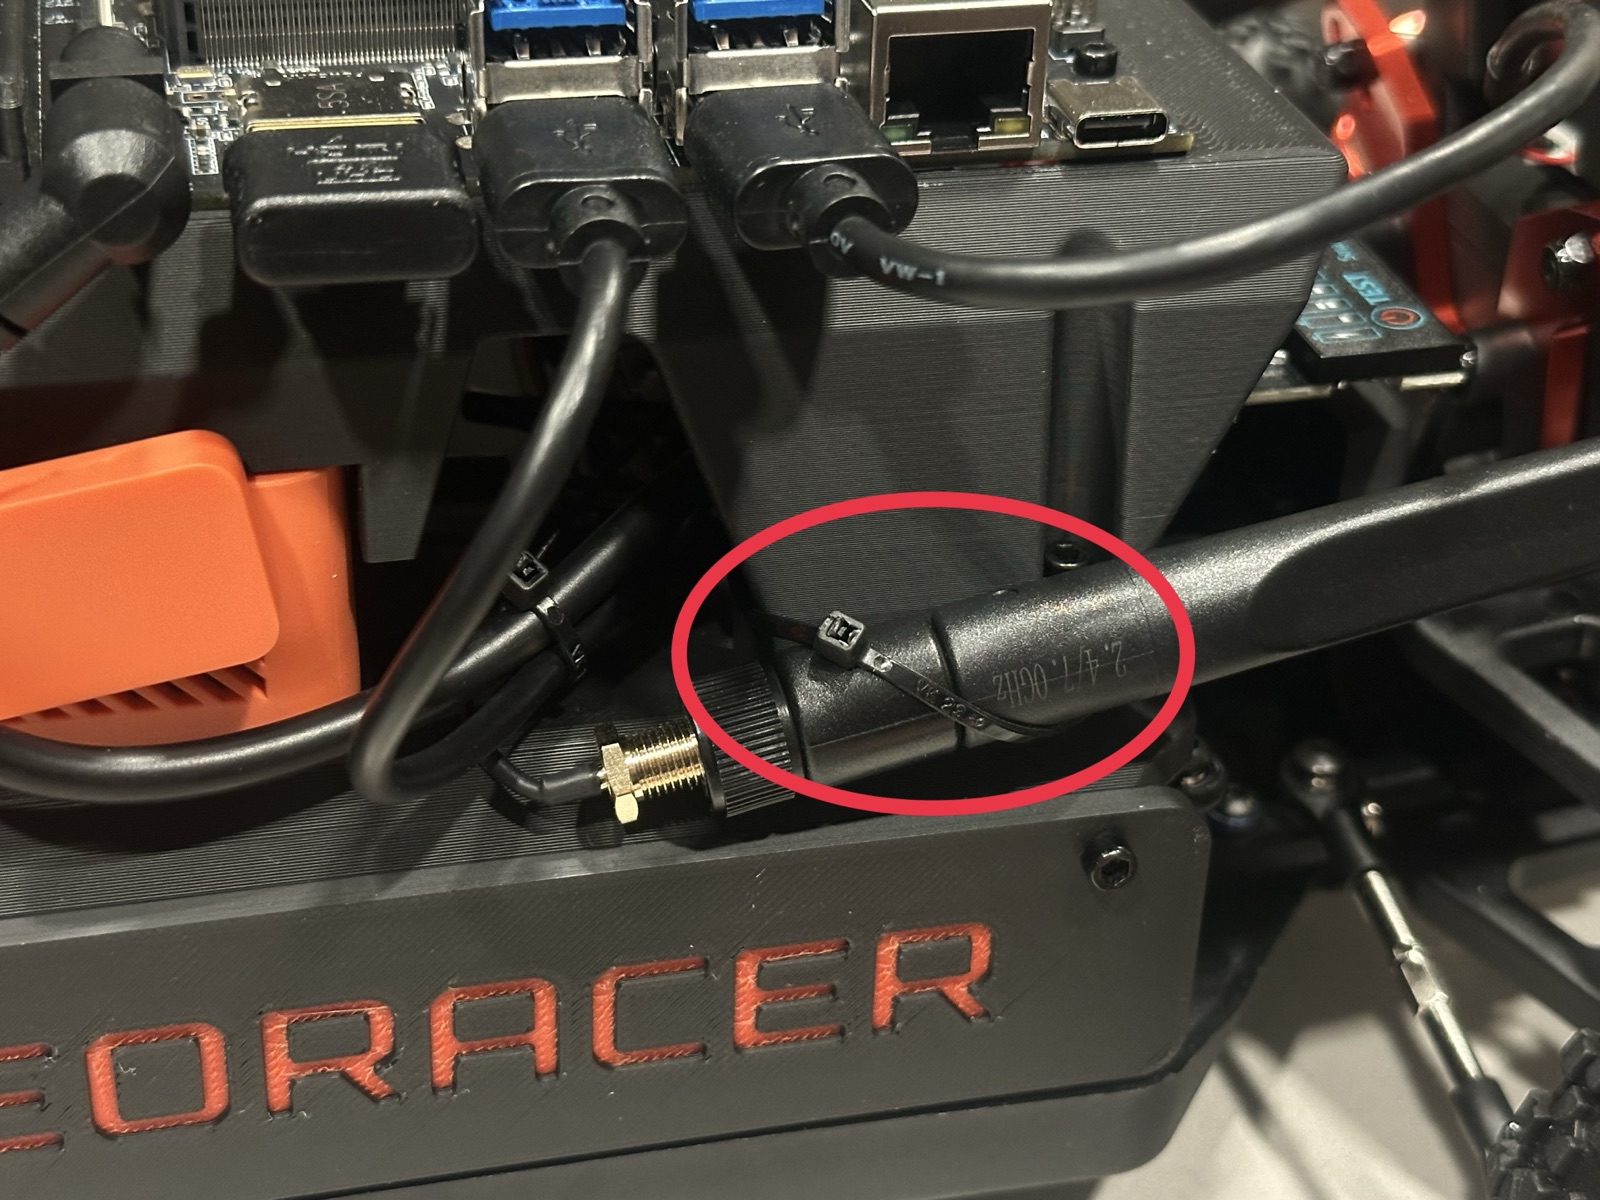
- Zip-tie each antenna to the front of the top chassis, where the on/off switch is. Route the zip tie around the antenna with one side above it and one below. Do the same on the other side.
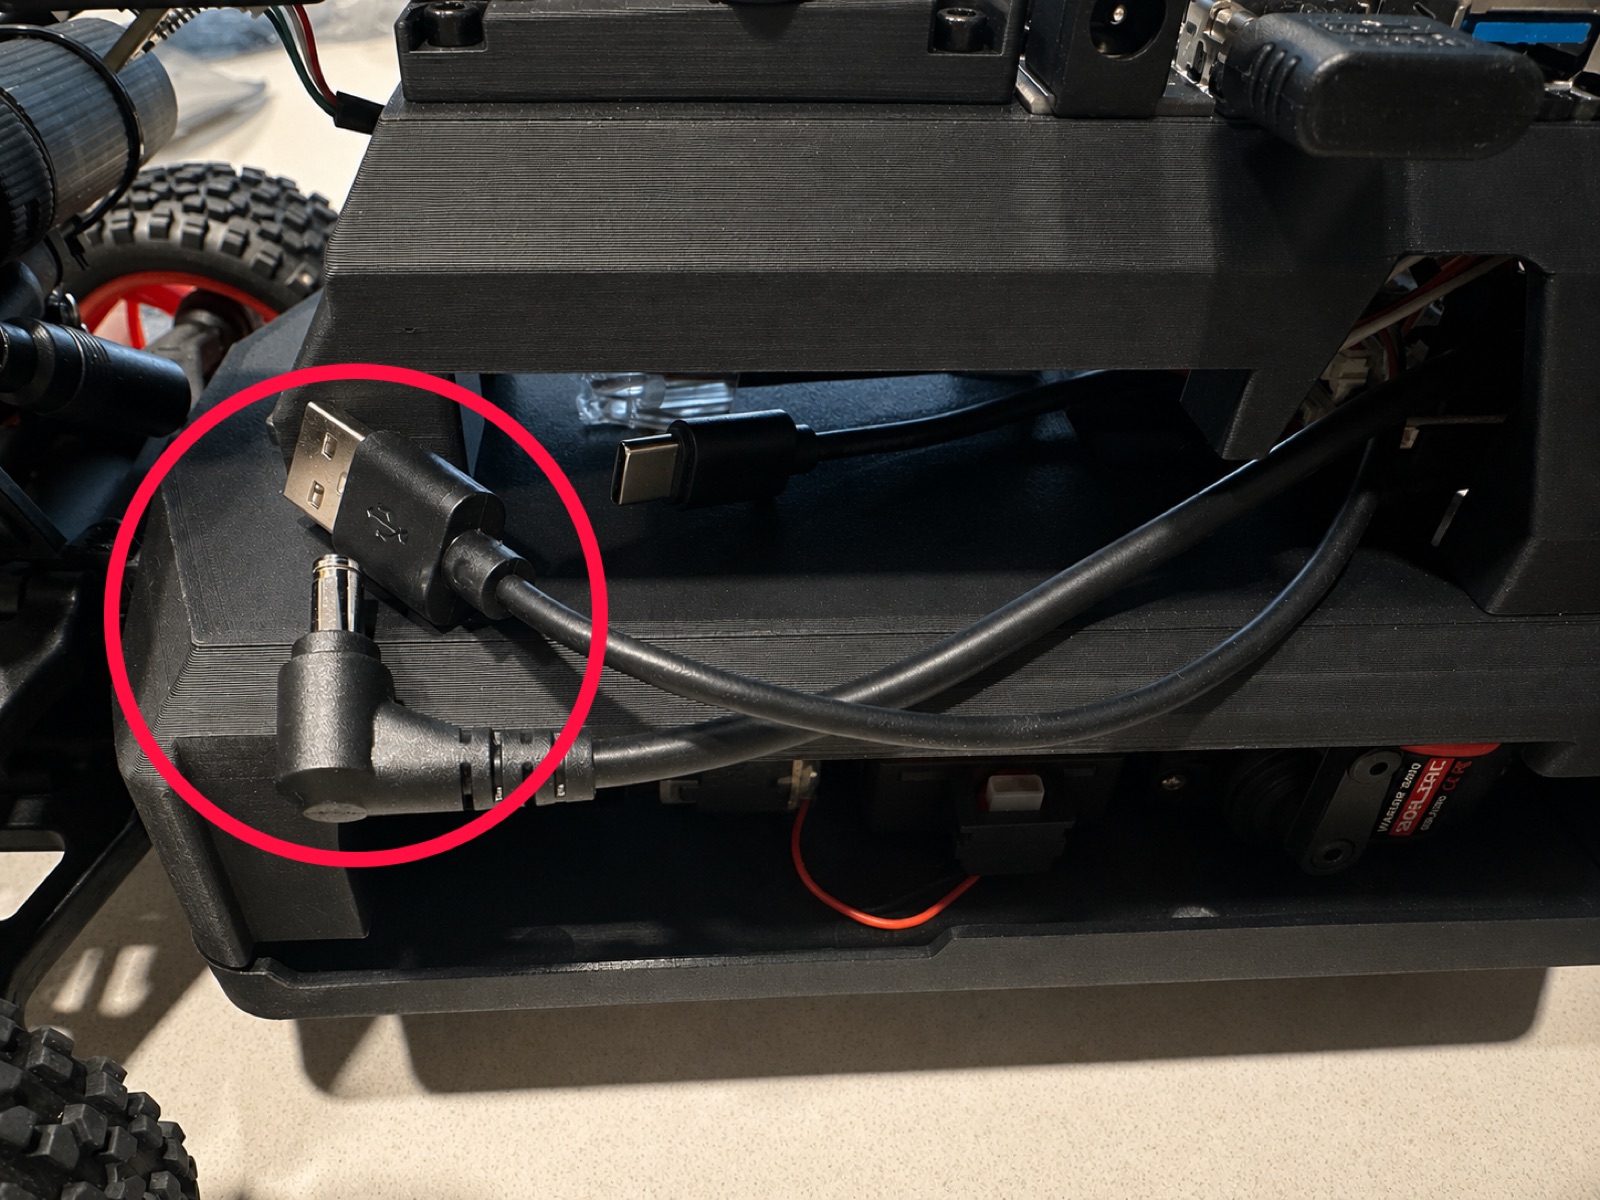
- Find the two cables on the right side of the car: one USB-A and one DC barrel jack.
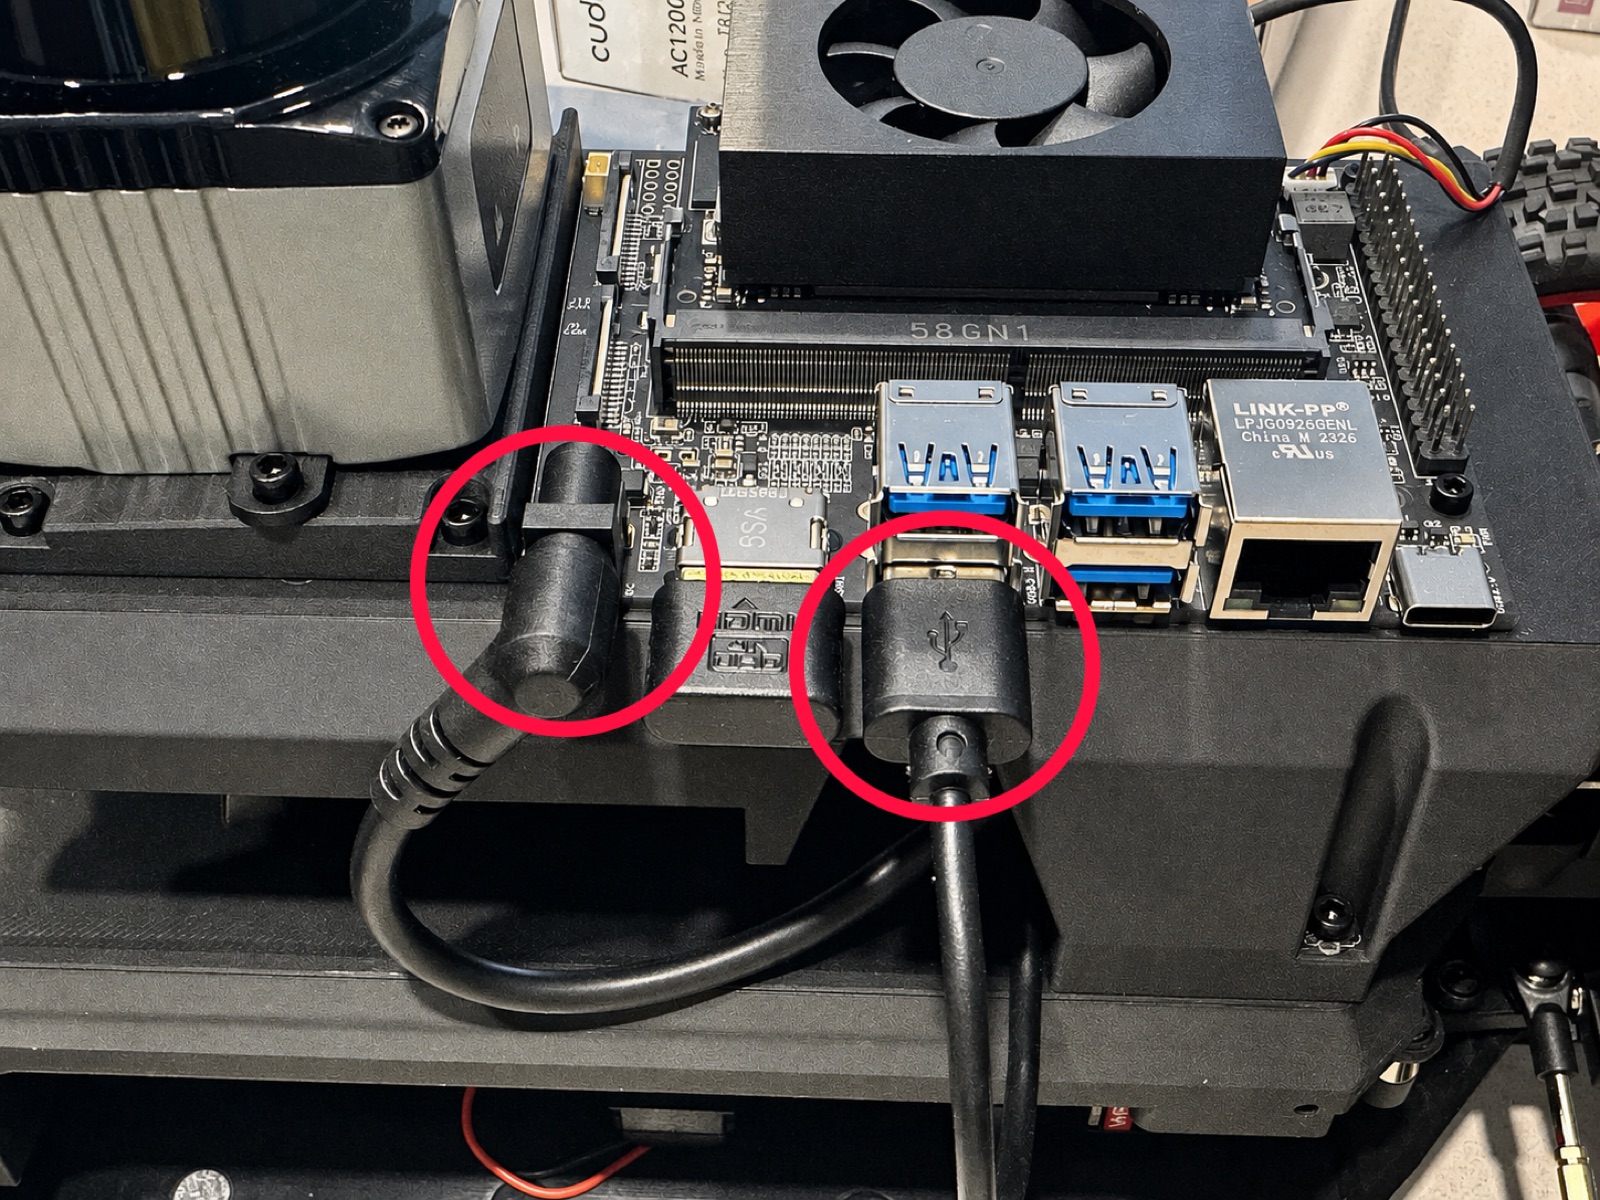
- Plug both cables into the Jetson.
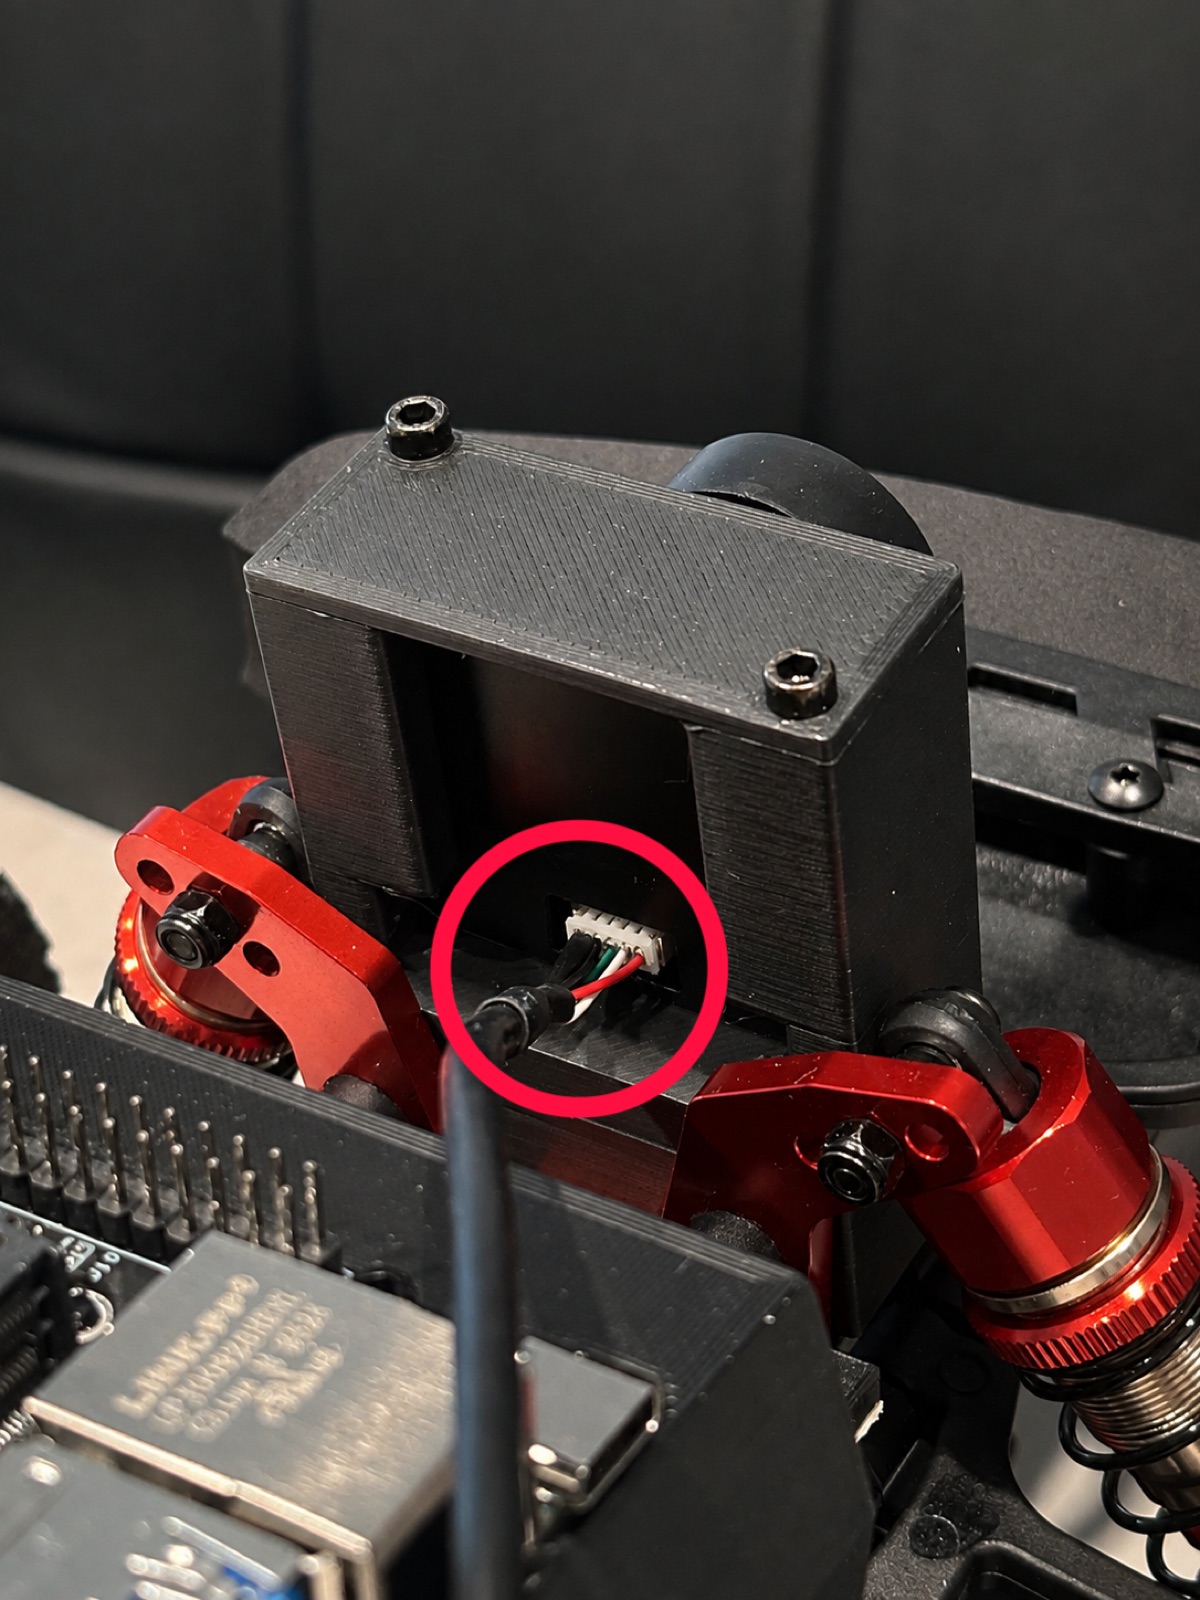
- Make sure the camera is plugged into the Jetson. The camera uses a JST connector and connects over USB-A.
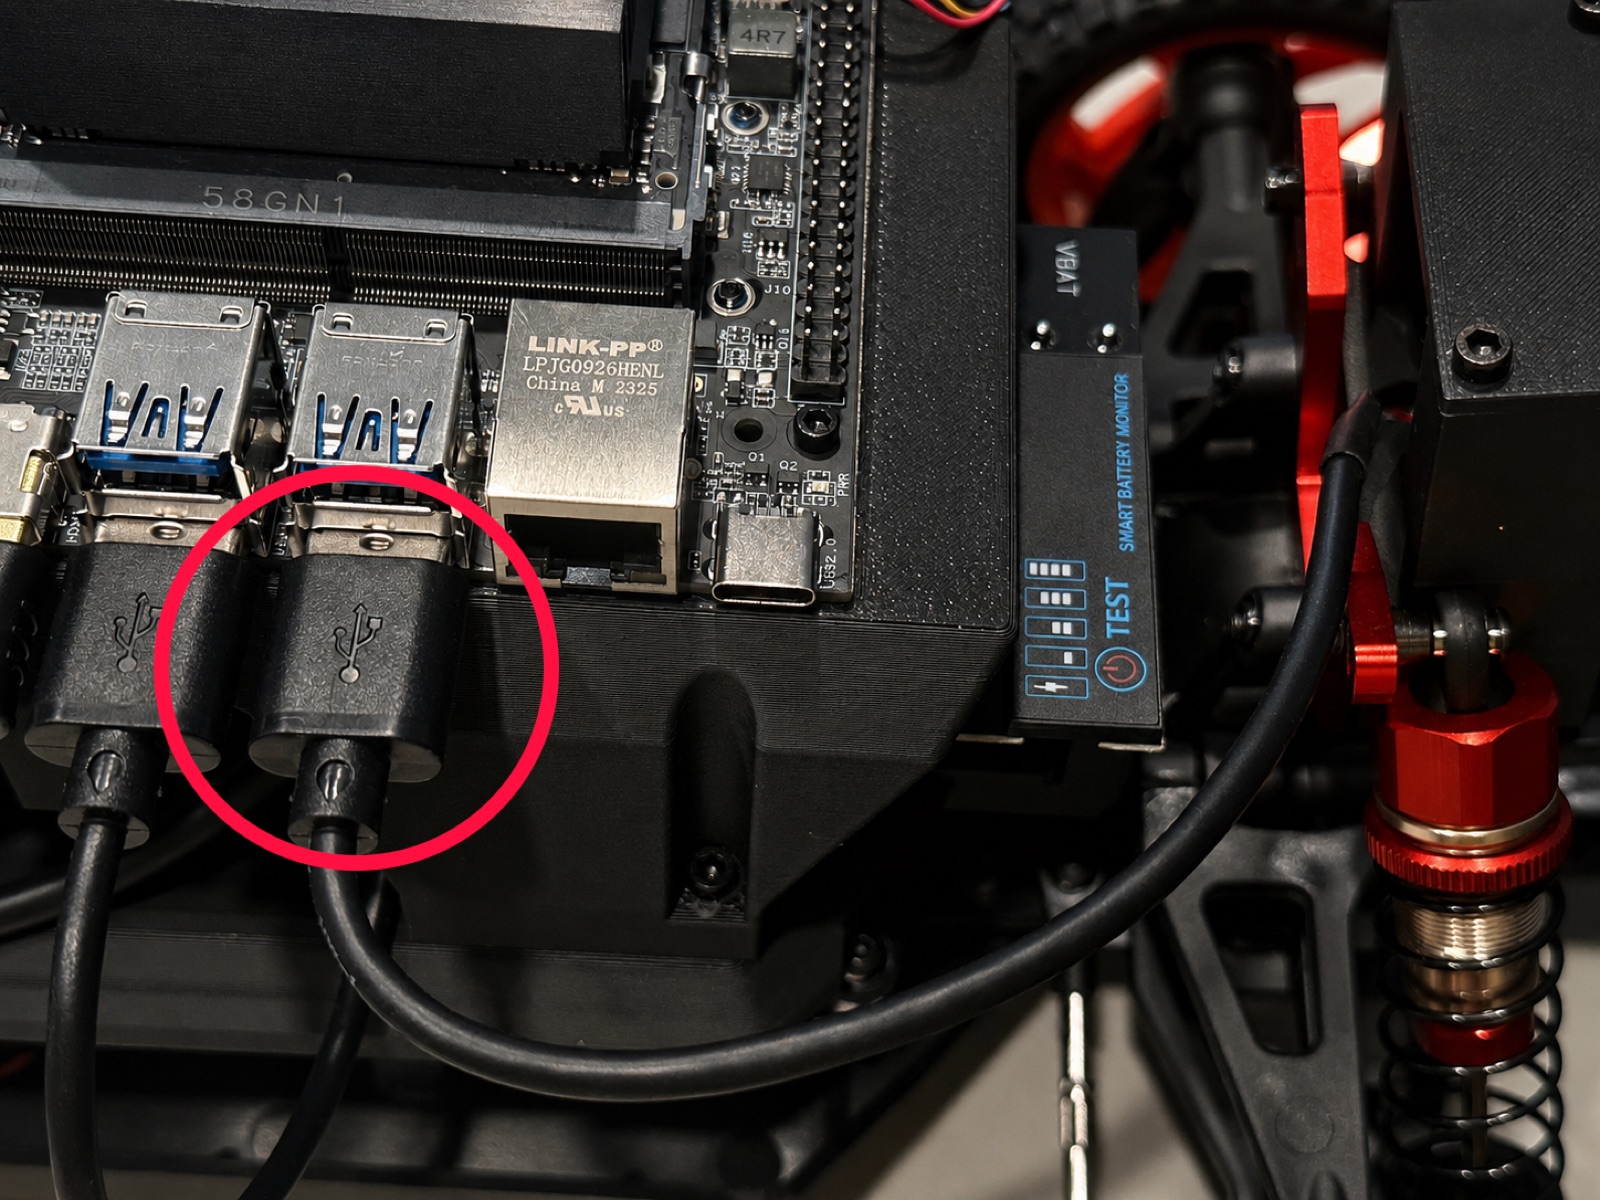
- Plug the longer USB-C cable into the LiDAR.
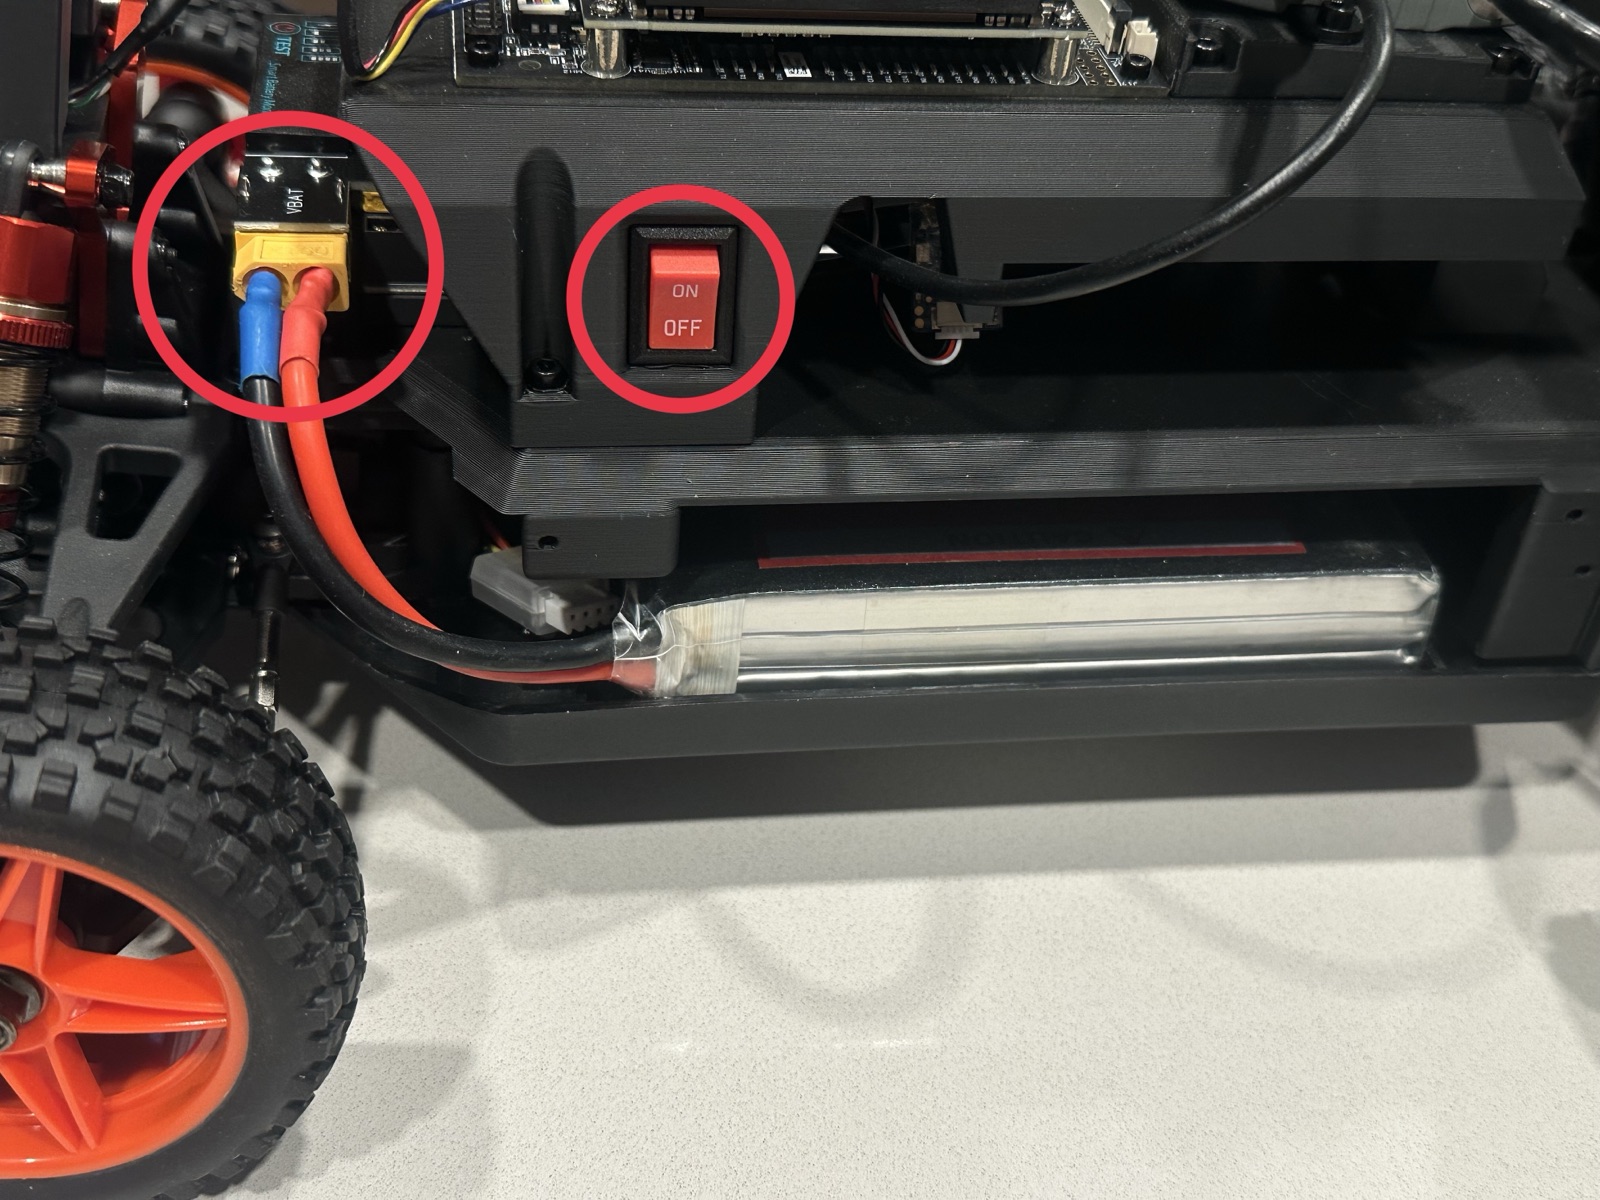
- Make sure the car power switch is off.
- Place the battery on the left side of the car. Connect the XT60 cable to the car and tuck the balance lead inside the chassis.
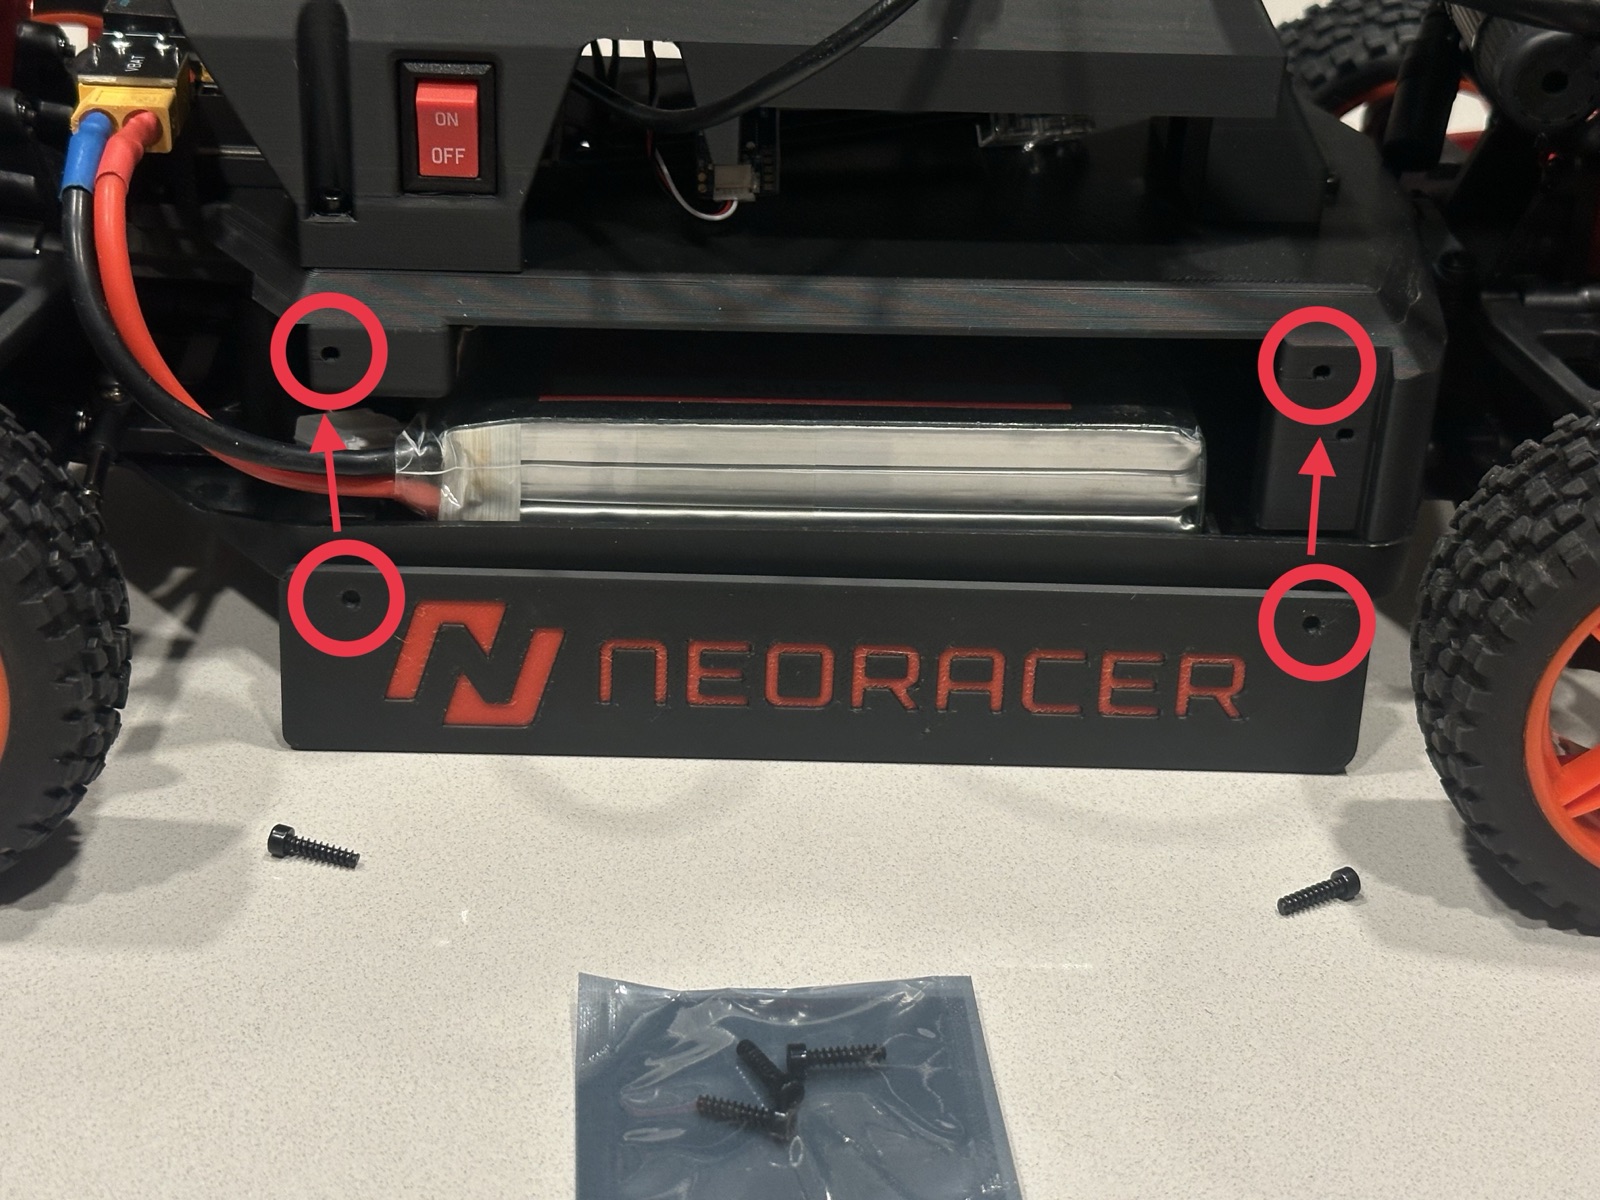
- Screw the sidepods onto the car using the screws from the screws bag.
- Remove the HDMI plug already on the car and keep it somewhere safe. Whenever a monitor is not connected, it needs to be plugged back in.
- Connect a monitor to the Jetson's HDMI output.
- Connect a USB keyboard and mouse.
- Power the car on and log in as
racecar(passwordneobotics).
The install on the next page needs internet. Either works:
- Join your Wi-Fi. Open the network menu in the top-right of the desktop and join any Wi-Fi with internet.
- Or plug in Ethernet. Connect a cable with internet to the Jetson's RJ45 port, then switch Wired on in the same network menu.